

 HANDS ON SharePoint
 HANDS ON Teams
 HANDS ON Lists
 HANDS ON tek
 M365 Admin
Celebrate work anniversaries on your SharePoint Intranet
User adoption is fundamental for the success of Intranet projects and you might find yourself thinking about new ways to engage your users with the internal portals.
Useful information for the daily work is fundamental but sometimes is not enough, social content can play a big role on the success of your intranet.
In this article you will find instructions to create a webpart to celebrate work anniversaries with your employees, showing appreciation for their hard work may result in higher user adoption rates.

To achieve this task, I’ll use a custom list and the BindTuning Filters web part. The Filters web parts allows you to easily transform any type of data existent on your SharePoint into a tile view with the possibility to refine it using CAML Query.
Custom List
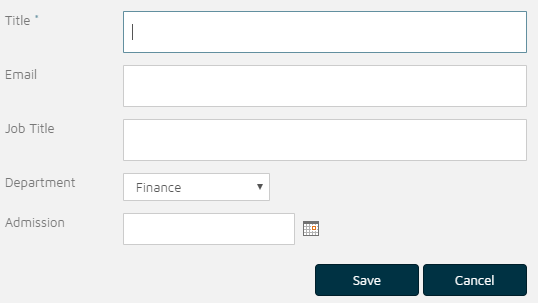
The information for this project will be stored on custom list with the following columns:
- Title – Text – The default title column will be used to store the user name
- Email – Text
- Job Title – Text
- Department – Choice
- Admission– Date
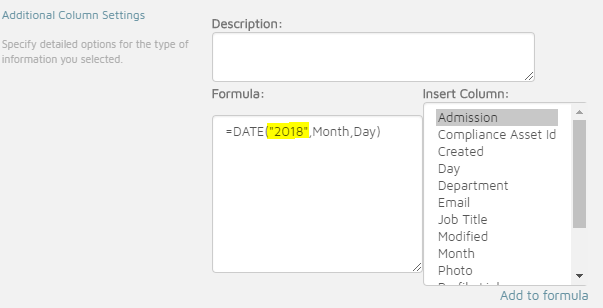
- Photo – Calculated Field – The webpart will display the user profile photo, the calculated field is using the profile picture method explained in this article
- Anniversary– Calculated Field
- Month – Calculated Field
- Day – Calculated Field
- Year – Calculated Field
- Profile Link – Calculated Field
- Years – Calculated Field
Calculated fields allow you to create date based on other columns data, if you want to learn more about check the official documentation.
Bellow you have all the formulas need to implement this solution.
| Name | Type | Formula |
| Photo | Single line of text | =CONCATENATE(“/_layouts/15/userphoto.aspx?size=L&username=”,Email) |
| Anniversary | Date and Time | =DATE(“2018”,Month,Day) |
| Month | Number | =TEXT(Admission,”mm”) |
| Day | Number | =TEXT(Admission,”dd”) |
| Year | Number | =TEXT(Admission,”yyyy”) |
| Profile Link | Single line of text | =CONCATENATE(“https://tenantname-my.sharepoint.com/PersonImmersive.aspx?accountname=i%3A0%23%2Ef%7Cmembership%7C”,Email) |
| Years | Number | =2018-Year |
Note: The profile link must formula must be updated with your tenant name.
Once you have your list created you will need to populate it with your employees information, despite having a lot of columns the form is pretty basic and most of the data will be generated automatically by the calculated fields.
Filters Web Part
BindTuning Filters Web Part is available here (a 30 day trial is also available) and it can be installed on all SharePoint versions. In this article I’ll apply it to a Classic publishing site but the process for modern sites is similar.
After installing the web part you will need to create a Filters list to store the tile template for your tiles, to do it follow this steps:
- Go to Settings and then Site Contents
- Click on Add an App
- Search for Filters and click on Filters BT
- Provide a name to the list e.g. Anniversaries Template
Now that you have your source list with the anniversaries of your users and the template list created is time to add the web part to the page.
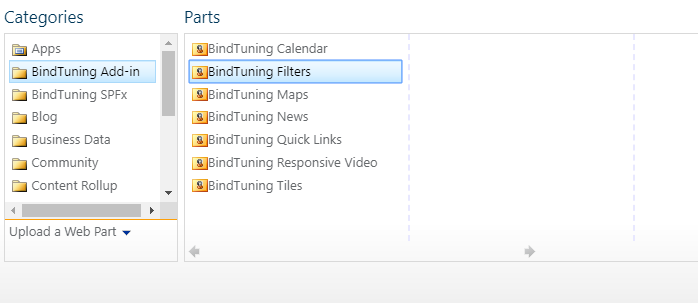
- With the page in edit mode Add new Web Part
- From the BindTuning Add-in group select the Filters web part
- Once the web part is on the page click on the cog icon
- Provide the link for the Template List URL
- Provide the link for Data Source, your list with the anniversaries
- On the Source Query paste pate the query below, it will get the work anniversaries for the next 30 days
- On the filtering options type Department, this will allow you to refine the web part results per department, if you want to refine it further you can add other columns from the source list
- Click Save
- Click on the plus icon (Create new Template)
- Provide a name for your Template
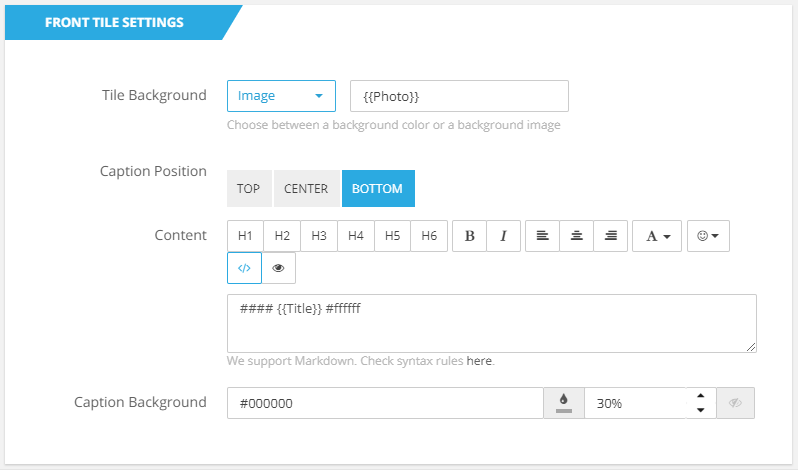
- The template is used to transform the original data into a tile, to identify a column from the source list you must provide the name of the column between {{}} e.g. {{Photo}}
- Check the image below where the profile picture is added as background and the name is displayed on top of it
- The tile has 2 faces, check the image below where the number of years, department and job role are displayed
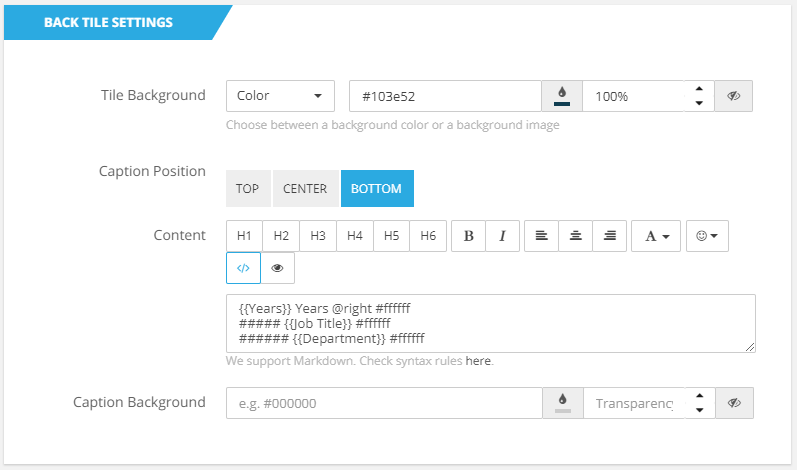
- To display the back face of the tile choose between one of the available Flip Settings
The result:
Maintenance
This solution requires manual maintenance to add or remove collaborators from the list, it also requires the update of the year each January 1st to display the correct number of years.
To update the dates, you will need to modify the Year on the Anniversary column and Years column following the instructions below:
- Go to the settings of your Anniversaries list
- Click in the Anniversary column to edit it
- Update the year, to the current year
- Click Save, all the records on the list will be automatically updated and the web part will reflect the changes immediately
- Repeat steps 2 and 3 for the Years column


January 7, 2019
Can you advise if there is a recommended solution to display the details with OOTB web parts at all?
March 26, 2019
Hi Jason,
I’m not aware of a solution to this with the OOTB web parts
August 19, 2020
I have no idea how to implement this. Can you please help from where can I create this as I am not able to see such option in my SharePoint website.
August 21, 2020
Hi Naval,
This was achieved with a custom web part from BindTuning.
Have a nice day 🙂