

 HANDS ON SharePoint
 HANDS ON Teams
 HANDS ON Lists
 HANDS ON tek
 M365 Admin
How to add Microsoft Clarity to classic SharePoint
Microsoft Clarity is the new tool that allows you to record sessions and access to heat maps of the user interaction with your site, helping you to find and fix the areas of the pages that are not working as expected.
After my last article about Microsoft Clarity where I explained how to add the toll to modern SharePoint, I received a few questions about how to do the same thing for classic SharePoint sites, the process is quite simple and, in this article, you can find a solution that will help you deploying Clarity to classic.
Combined with the previous solution you will get a global overview of all the SharePoint sites in your intranet.

How to setup Microsoft Clarity
First things first, before deploying Clarity on SharePoint you first need to create an account and setup a new project by doing the following:
- Go to https://clarity.microsoft.com and click on Sign in
- Select the account you want to use to Sing in into the platform, you can use a Microsoft Account, a Google account or Facebook
- Click on the tile Add new project
- Fill the form with the details of the site:
- Name: This is the identifier of the site, the name of your intranet or SharePoint site is a good fit
- Website: The url that Microsoft Clarity will monitor
- Category: The category of your site
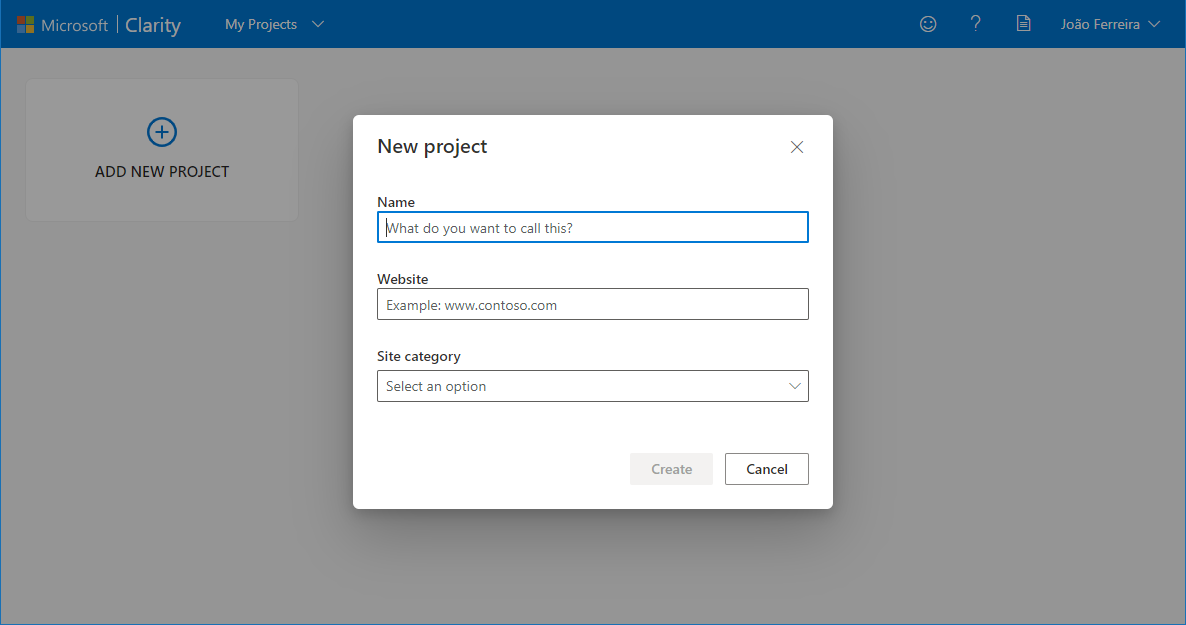
- Once you fill the form you will get a warning saying:
Clarity should not be used on sites that contain Sensitive Data including user health care, financial services or government related information.
Pay attention to this message and make sure you do not deploy the solution to site collections with sensitive data. - Once created click in the tile with the name of your project
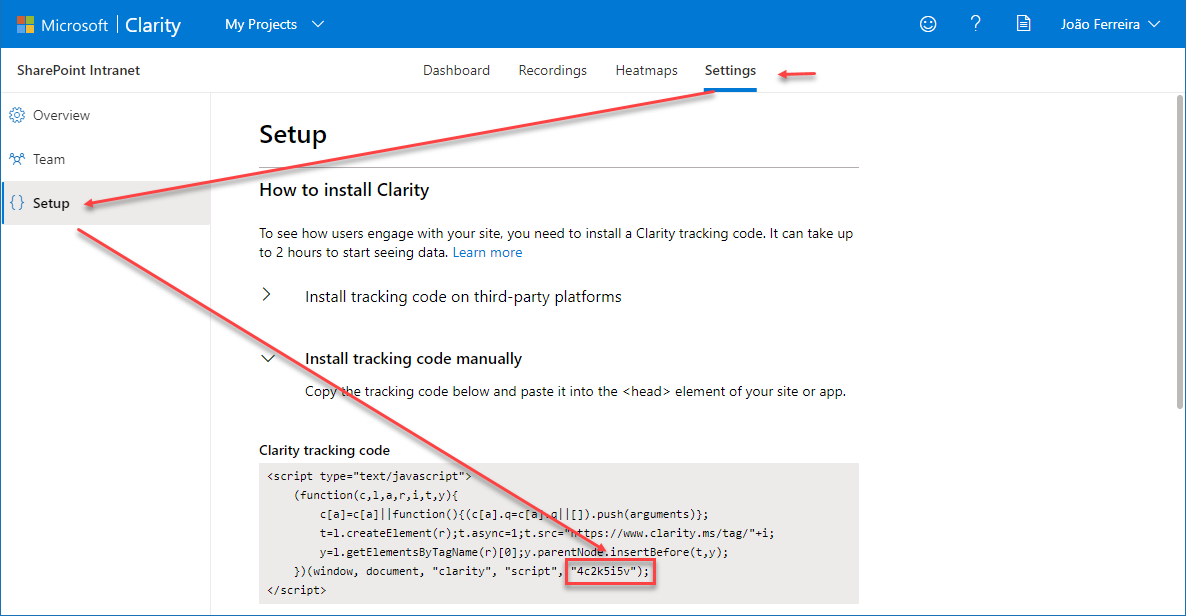
- On the top menu click on Settings
- On the vertical menu click on Setup
- From the Clarity tracking code copy the unique identifier as highlighted in the following image
Install Microsoft Clarity for classic SharePoint
To install the solution in your SharePoint and start tracking your sites follow the steps below:
- Download the solution from here
- On your site collection root site go to Settings -> Site Settings -> Solutions
- Upload and activate the solution
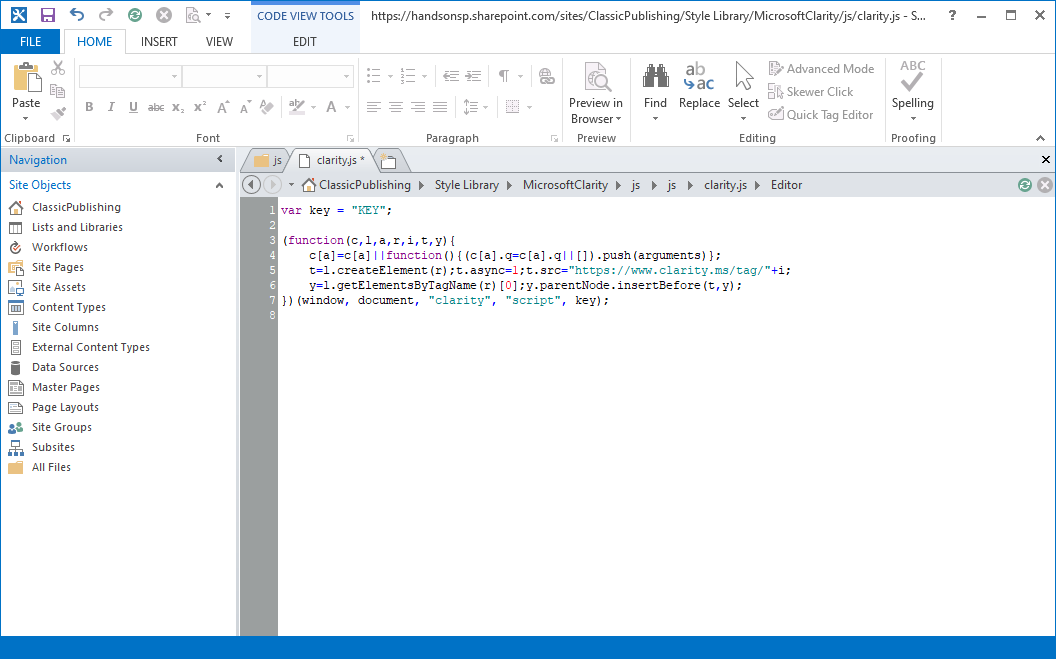
- Open your site with SharePoint designer
- Go to All Files -> Style Library -> Microsoft Clarity -> js
- Check out and edit the clarity.js file in advanced mode
- In the first line of the script replace the word key by your own key
Once you activate the solution, the Microsoft Clarity script is immediately added to your site however it is not tracking your site yet, you still need to add your key to the script
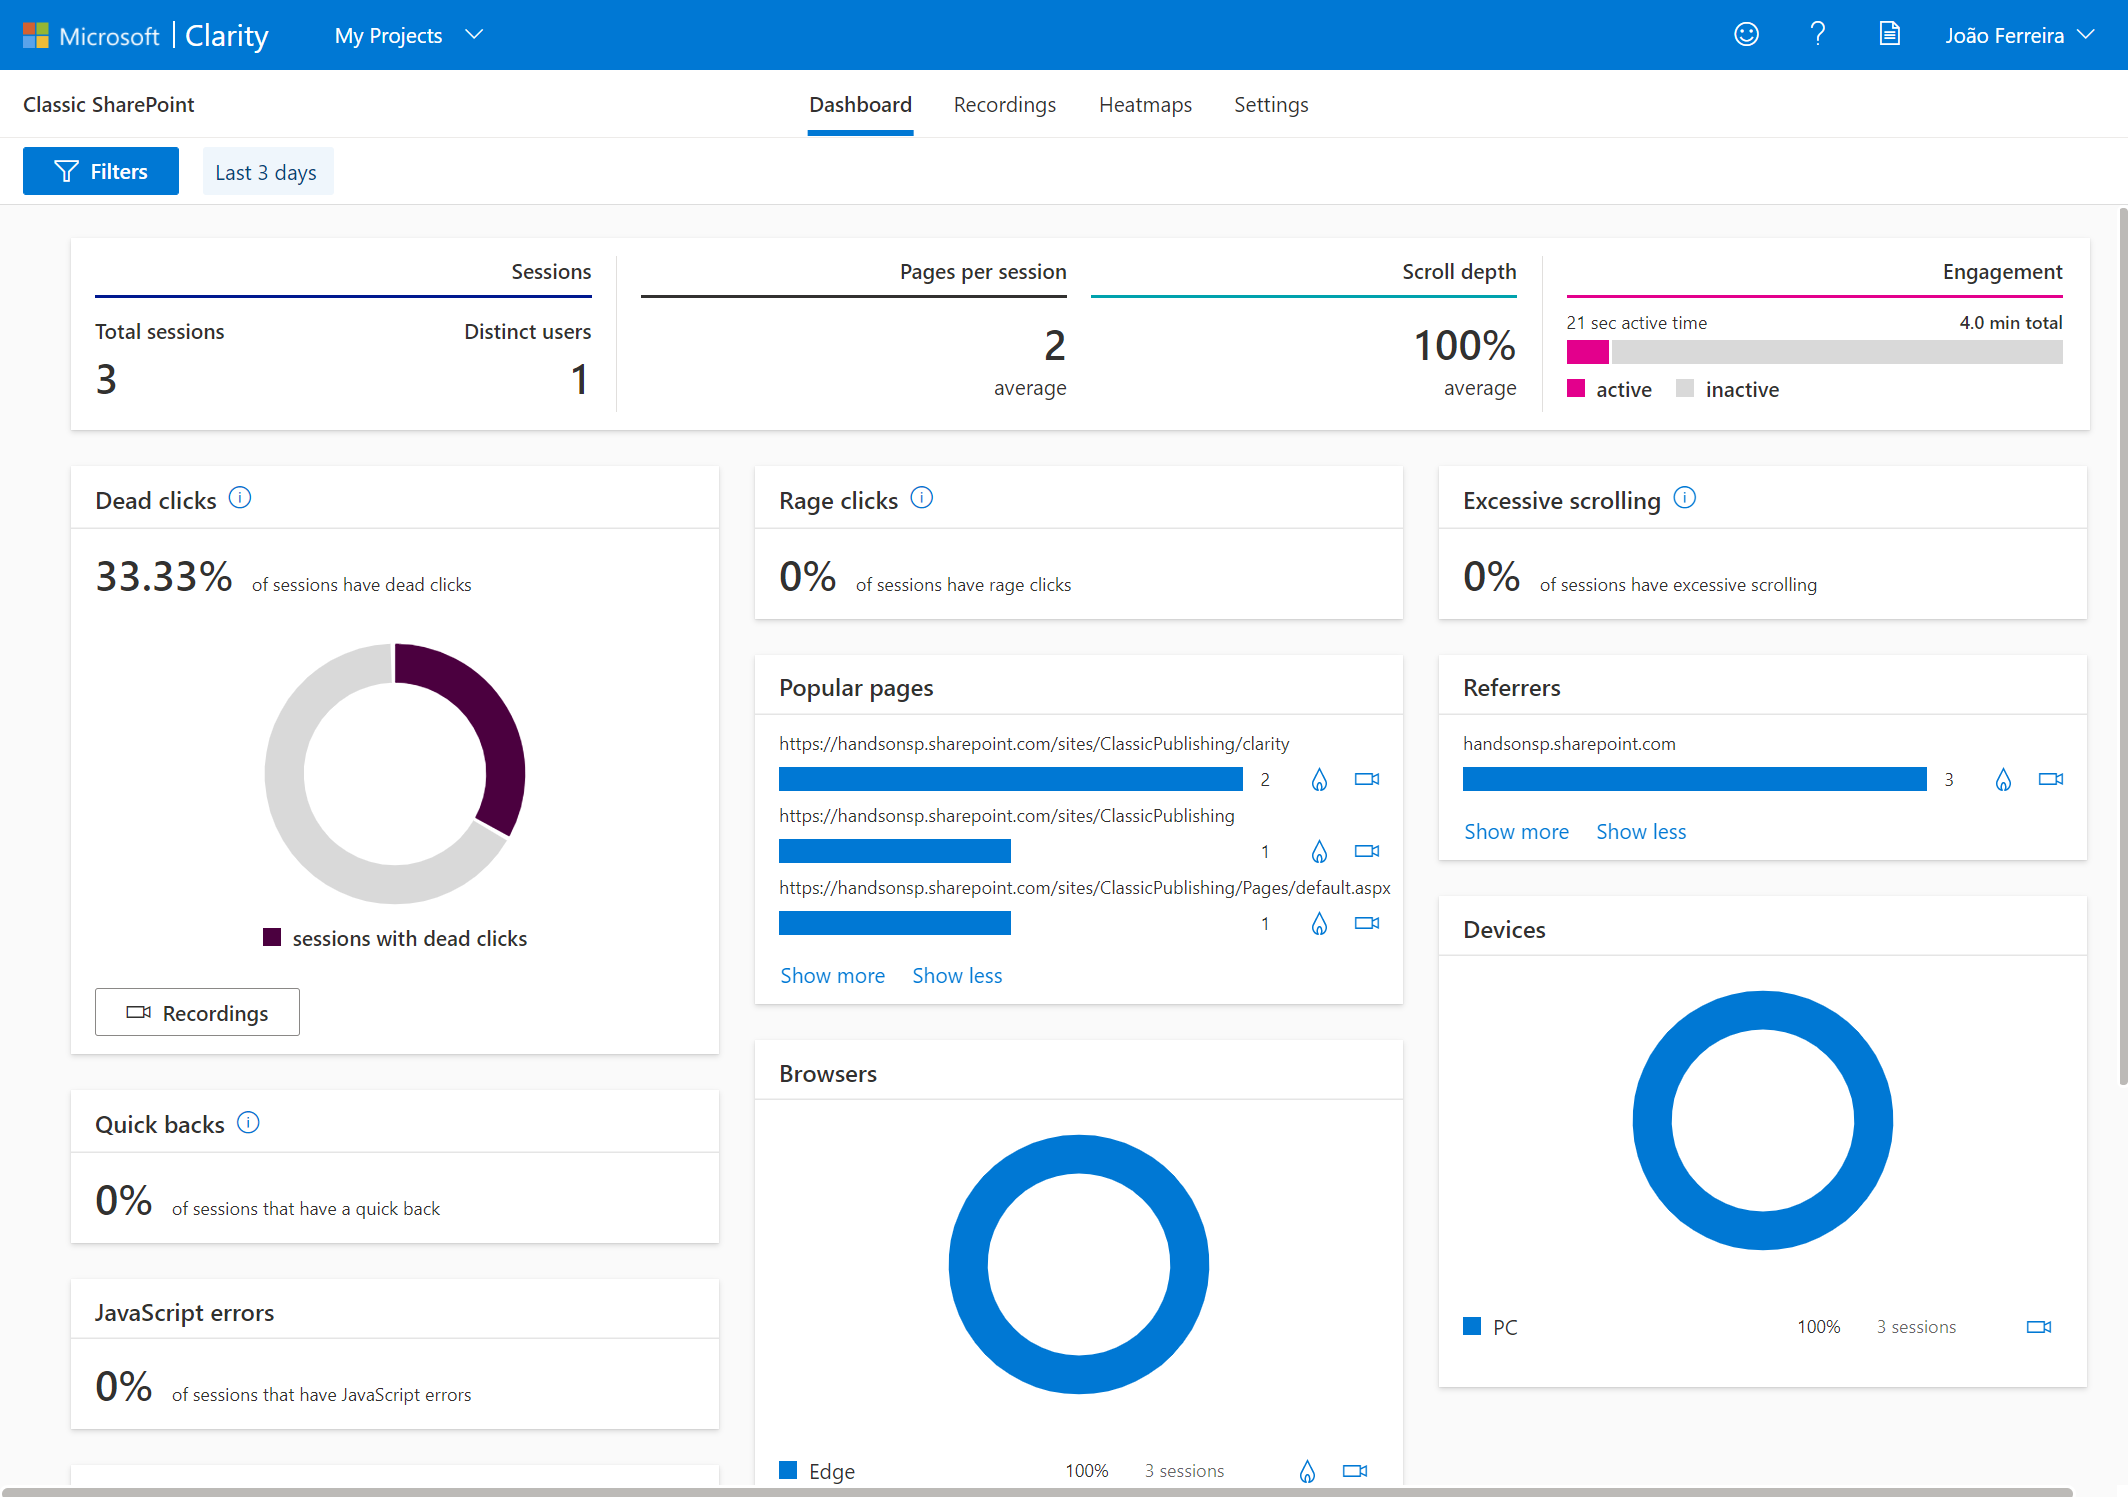
From this moment on all the sites in your site collection are being tracked by Microsoft Clarity and you will be able to understand how your users are interacting with the site.


No comments yet