

 HANDS ON SharePoint
 HANDS ON Teams
 HANDS ON Lists
 HANDS ON tek
 M365 Admin
How to add Microsoft Clarity to modern SharePoint
Creating engagement and measuring the success of any intranet is always a challenge, tools like Azure Application Insights and Google Analytics give you the usage metrics and now you can complement this information with Microsoft Clarity the new user behavior analytics tool.
Microsoft Clarity will gives you the recording of the sessions and heat maps of the user interaction with the site, this will help to find and fix the areas of your pages that are not working as you expect.
In this article I’m proving a readymade solution to add Microsoft Clarity to modern team sites and modern communication sites in just a few clicks, if you are not yet familiar with this tool yet I suggest you to have a look to the awesome series of articles that Megan V Walker as put together.

How to setup Microsoft Clarity
First things first, before deploying Clarity on SharePoint you first need to create an account and setup a new project by doing the following:
- Go to https://clarity.microsoft.com and click on Sign in
- Select the account you want to use to Sing in into the platform, you can use a Microsoft Account, a Google account or Facebook
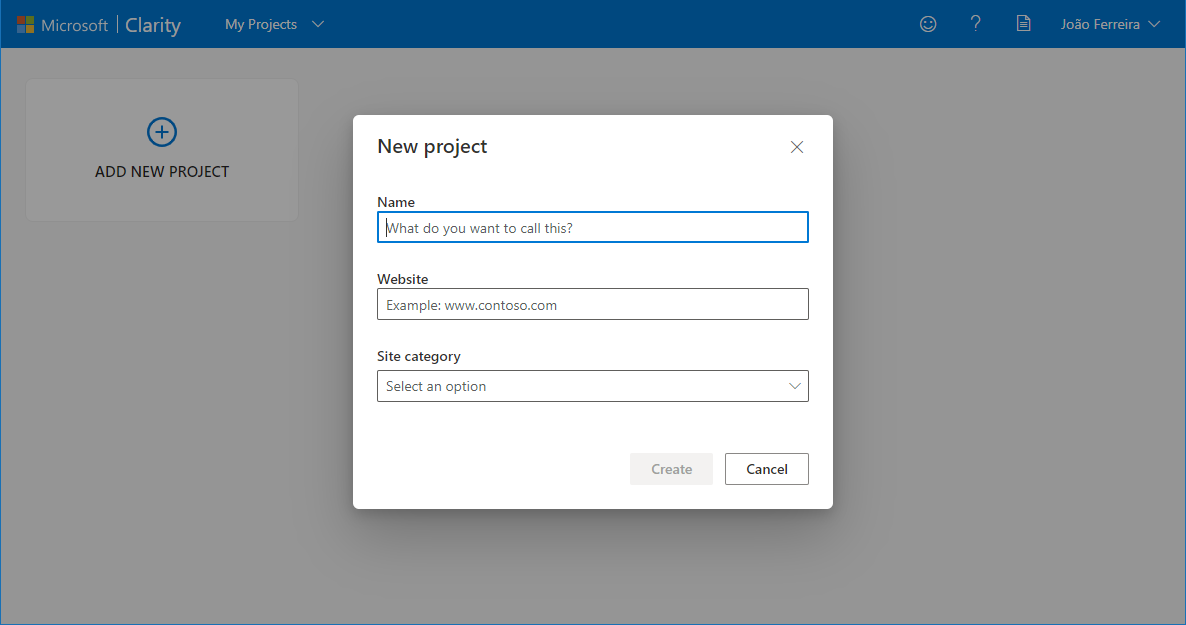
- Click on the tile Add new project
- Fill the form with the details of the site:
- Name: This is the identifier of the site, the name of your intranet or SharePoint site is a good fit
- Website: The url that Microsoft Clarity will monitor
- Category: The category of your site
- Once you fill the form you will get a warning saying:
Clarity should not be used on sites that contain Sensitive Data including user health care, financial services or government related information.
Pay attention to this message and make sure you do not deploy the solution to site collections with sensitive data. - Once created click in the tile with the name of your project
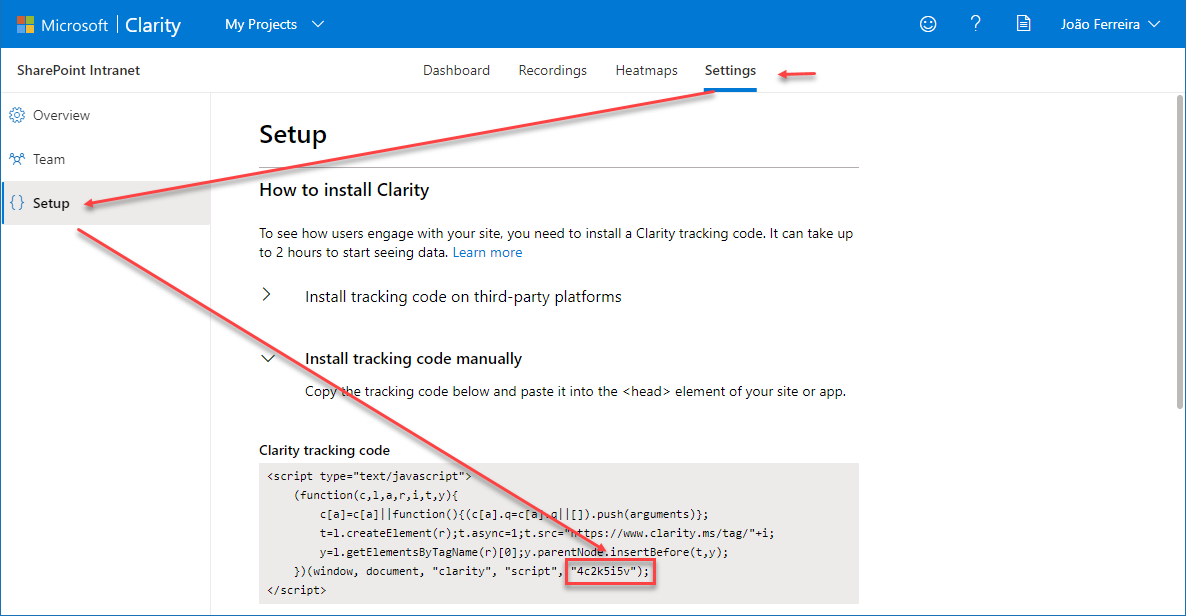
- On the top menu click on Settings
- On the vertical menu click on Setup
- From the Clarity tracking code copy the unique identifier as highlighted in the following image
How to install Microsoft Clarity solution on SharePoint
Once you get the unique identifier for the Microsoft Clarity project its time to install the solution on SharePoint, you can download the installation package from here and if you want to have a look to the source code on GitHub I also have it available here.
This solution can be deployed once and become available to all modern site collections in the tenant, (this will include all the existent and new sites created in the future) or you can fine tune it and deploy it per site collection.
How to deploy Microsoft Clarity globally
To deploy the solution globally you must have access to the tenant app catalog, once in the catalog you must do the following:
- From the vertical menu click on Apps for SharePoint
- Upload the previously downloaded sppkg solution
- Make sure you check the option Make this solution available to all sites in the organization
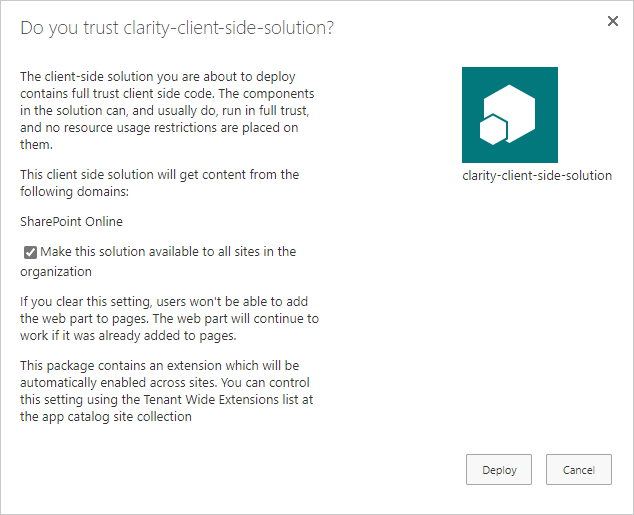
- Click on Deploy
- Once deployed go to site contents and open the Tenant Wide Extensions list
- Look for the item with the title MicrosoftClarity
- Edit the item and add your own unique ID in the Component Properties as shown in the following picture
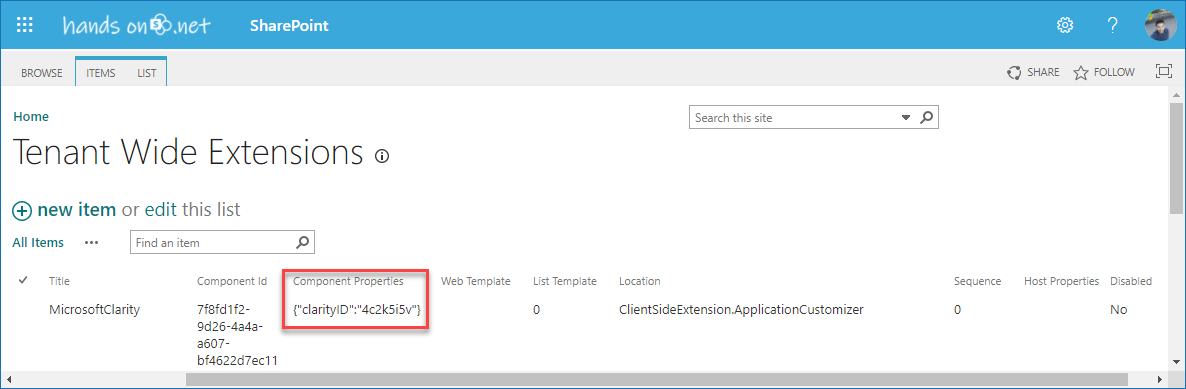
- Save the item and your solution will start monitoring all your modern SharePoint sites
How to deploy Microsoft Clarity per site collection
In order to deploy the solution only to specific site collection you must previously have a site collection app catalog created, if you need to know more about site collection app catalogs and how to create them have a look to this resume from my friend David Ramalho.
With the site collection app catalog created do the following:
- Go the site collection Site Contents
- Open the Apps for SharePoint
- Upload the previous downloaded sppkg solution
- Click on Deploy, DO NOT check the option Make this solution available to all sites in the organization
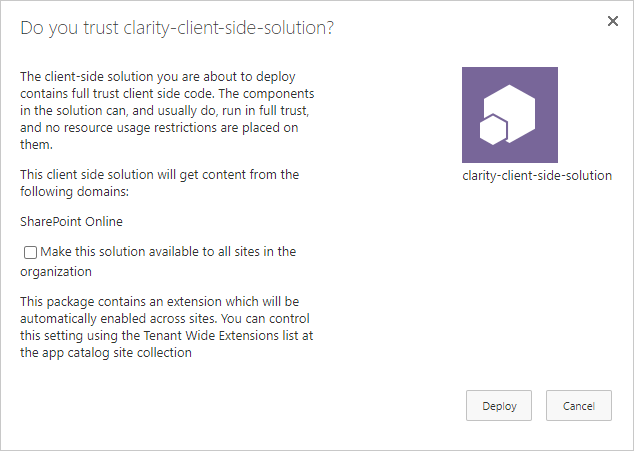
- Once deployed go back to Site Contents and click New
- From the drop down click on App
- Search for clarity-client-side-solution and click on it to install
- On this step you will need to use PnP PowerShell, if you don’t have it installed you can get it form here.
Open PowerShell and type the following cmdlet, replacing the url by the url of your site collectionConnect-PnPOnline -UseWebLogin -Url https://yourtenant.sharepoint.com/ - Provide your Username and Password
- To enable the solution execute the following cmdlet, adding your own clarity project ID to the ClientSideComponentProperties
Add-PnPCustomAction -ClientSideComponentId "7f8fd1f2-9d26-4a4a-a607-bf4622d7ec11" -Name "Microsoft Clarity" -Title "Microsoft Clarity" -Location ClientSideExtension.ApplicationCustomizer -ClientSideComponentProperties: '{"clarityID":"yourOwnId"}' -Scope site
Conclusion
Once deployed, data will take approximately 2 hours to start populating the desktop and after it you will get access to the recordings of your users and the heat maps in the pages you are monitoring.
Deploying Microsoft Clarity to SharePoint is fairly easy with this SharePoint Application Customizer but before deploying it to your tenant please be aware that recordings might reveal confidential data, plan accordingly and deploy it only to the sites where you don’t have sensitive information.


December 17, 2020
Hello I tried the “per site col” installation, but nothing seems to go into Clarity.
The Add-PnPCustomAction seems to pass fine but nothing is in output, is there a way to check on SP if it’s been properly installed ?
Thank you
December 17, 2020
Hi Guillame,
Not getting anything in return in this case is usually a good thing.
You can check if the application is running by executing the following cmdlet connected to the site collection
If it is working fine by now you should have data already in clarity.
Have a nice day 🙂
February 25, 2021
Hello. The heatmaps shows only the top of the page, there is no way to scroll down. Have you met this one?
February 25, 2021
Hi Sergey,
Yes this is an issue with Clarity because it only detects the scroll if it exists in the body, which is not the case in SharePoint.
To scroll the heat map add the following script to your bookmarks and click on it once in the heat map page.
javascript:(function(){var iframe = document.getElementById("clarity-snapshot-heatmap-iframe");var elmnt = iframe.contentWindow.document.getElementsByTagName("body")[0];elmnt.style.height = "25000px";})();To learn how to use the bookmarklets have a look here.
Another way of doing it is zoom out the heat map but that way you will loose the details on the elements.
Hope this helps, have a nice day 🙂
April 6, 2022
Hi João,
Is there a way we can disable heatmaps for a specific page in SharePoint site ? e.g. I don’t want clarity to record one SharePoint list/Page that contains sensitive data.
April 27, 2022
Hi Syed,
Not that I am aware of, the only way of doing that would be to modify the solution to make sure the script was not executed in specific pages.
Have a nice day 🙂
October 11, 2023
Hi Joao,
Thank you so much for your step-by-step instructions; this is really helpful. I have implemented clarity in my modern SharePoint site, and everything working perfectly, except heatmaps show only the top of the page; there is no way to scroll down. I have created a bookmarklet using your suggested JavaScript, but it does not work. I have also checked other bookmarklets for the SharePoint site, all are working perfectly except the clarity one. Any advice?
—————–
javascript:(function(){var iframe = document.getElementById(“clarity-snapshot-iframe”);var elmnt = iframe.contentWindow.document.getElementsByTagName(“body”)[0];elmnt.style.height = “25000px”;})();
November 16, 2023
Hi Shohel,
The ID of the iframe element for the heatmap has changed, this updated version will make it work.
javascript:(function(){var iframe = document.getElementById("clarity-snapshot-heatmap-iframe");var elmnt = iframe.contentWindow.document.getElementsByTagName("body")[0];elmnt.style.height = "25000px";})();November 16, 2023
Hi Joao,
You are a genius! It worked now, and I’m so happy. Thank you so much for your help.
Best regards,
Shohel
January 26, 2024
Hi Ben,
It is possible to do it, but it may take you some time to deploy. You will need to create a site collection app catalog in each one of the sites that belong to the hub and deploy and configure the app for each one of them.
To create the site collection app catalogs you can follow this article:
https://sharepoint.handsontek.net/2024/01/26/create-sharepoint-site-collection-app-catalog-using-pnp-powershell/
Hope this helps, have a nice weekend