Transform Stream videos on SharePoint with custom thumbnails
Are you looking for a way to make your Microsoft Stream video content stand out from the rest? Have you considered using custom thumbnails to grab the attention of your audience? As the saying goes, a picture is worth a thousand words, and this applies to video thumbnails as well.
By choosing the right thumbnail, you can entice viewers to click on your video and increase engagement. In this blog post, I’m explaining how to use Microsoft Stream on SharePoint to add custom thumbnails to your video and audio files. With these tips, you can take your video content to the next level and make a lasting impression on your audience.

How to add a custom thumbnail to a Stream video
Microsoft Stream on SharePoint offers two ways to add a thumbnail to your video or audio file: by picking a frame from the video or by uploading a custom thumbnail.
- Open the video or audio file you want to edit
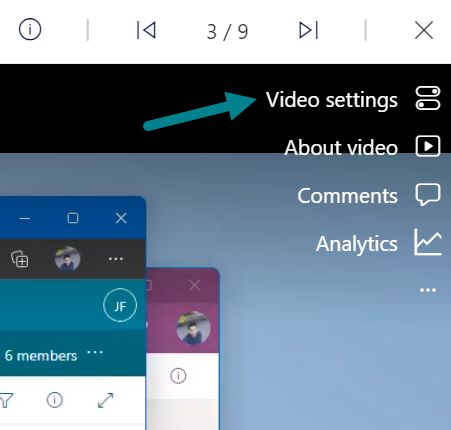
- Click on the Video settings button located at the upper-right corner of the screen

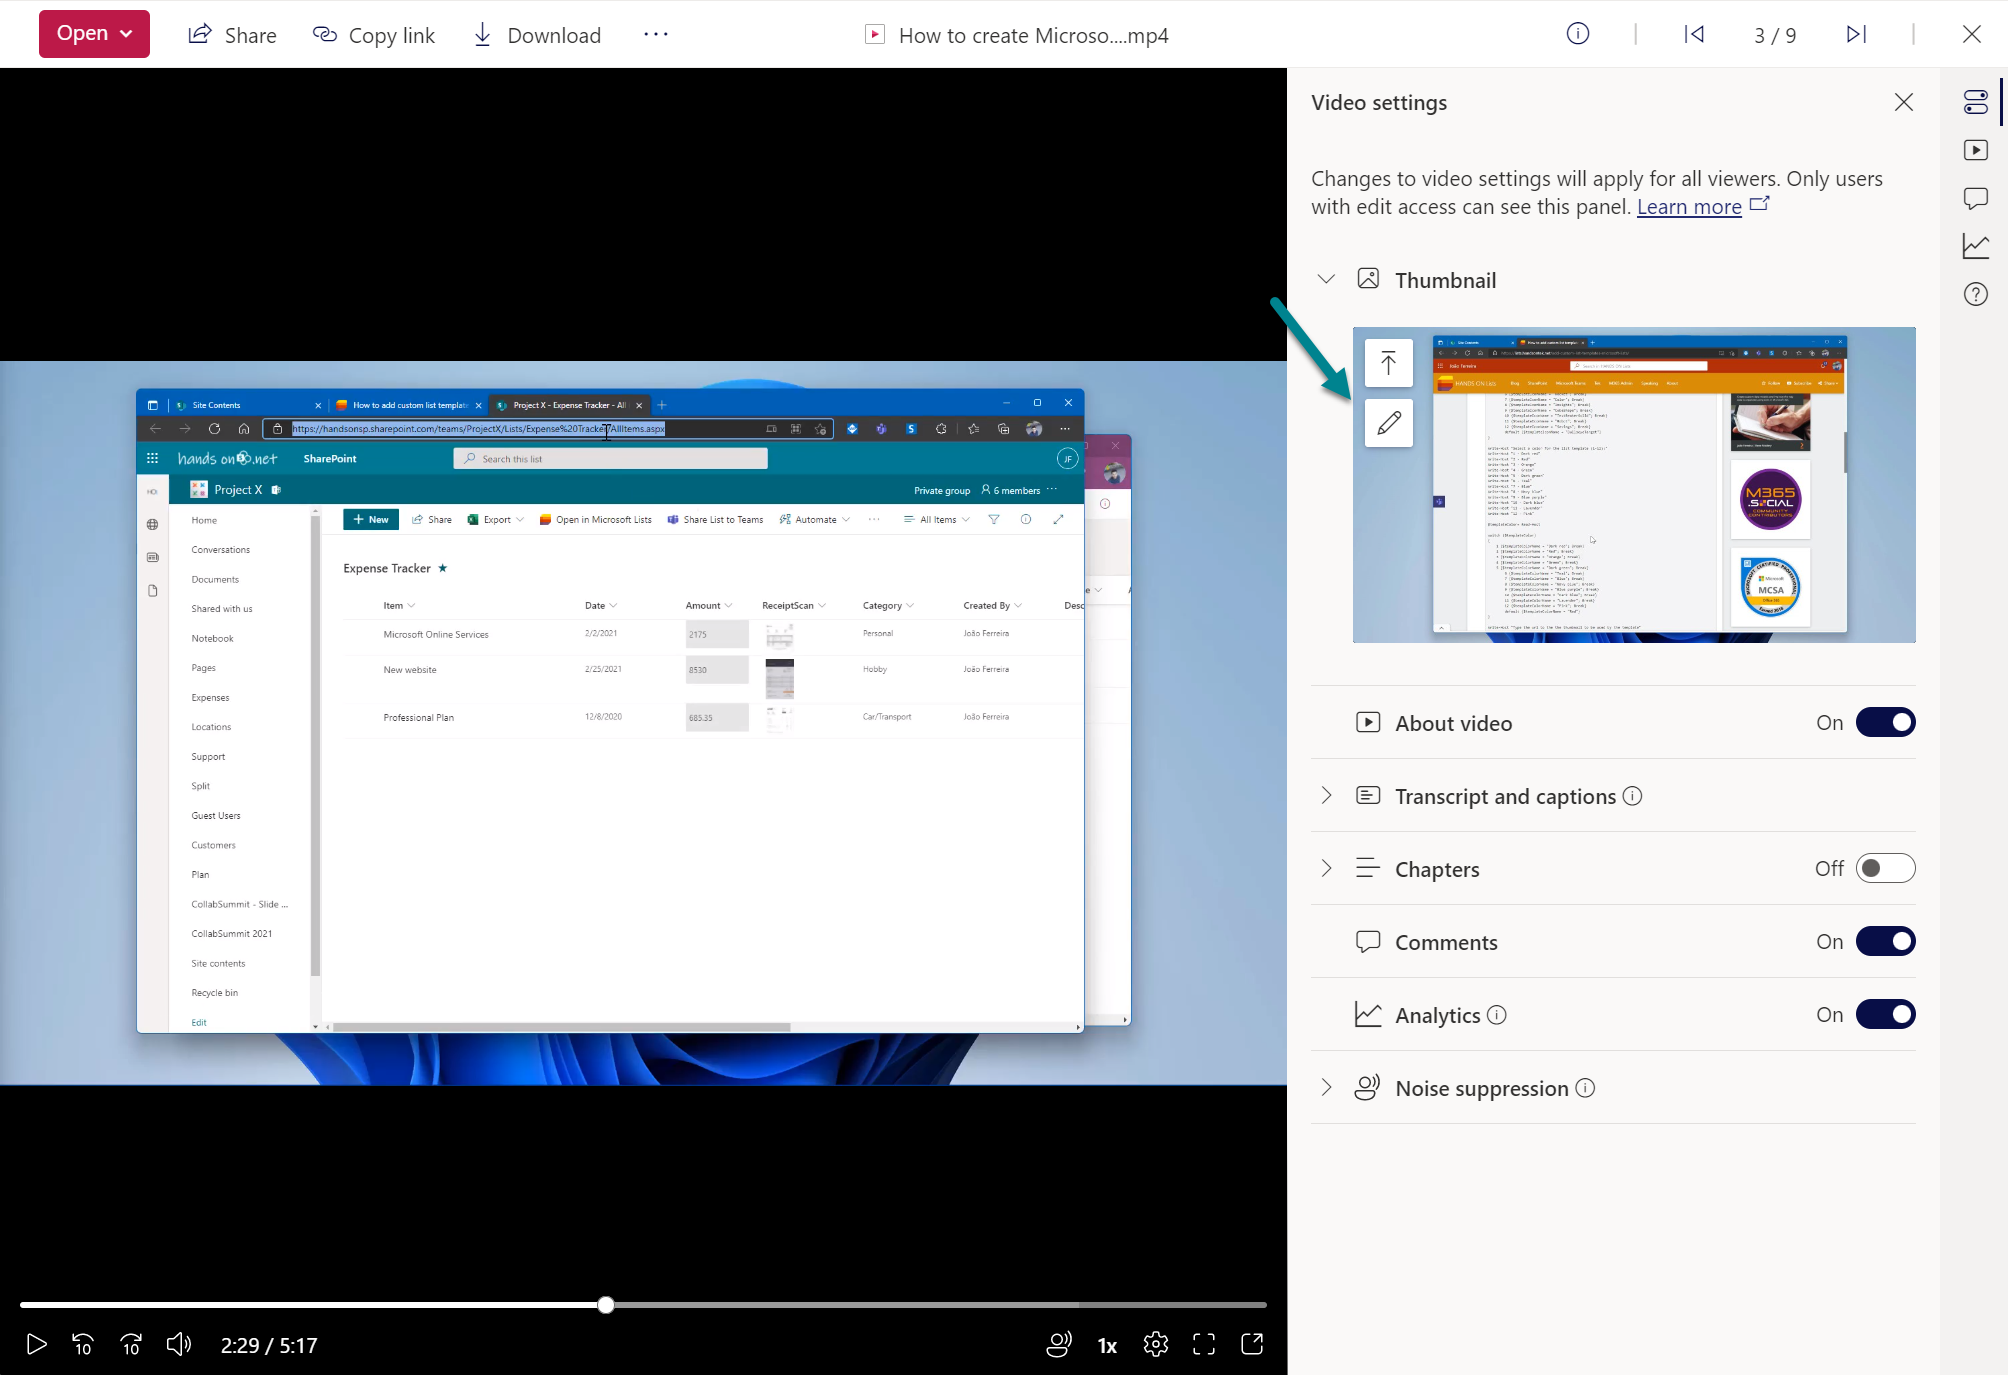
- A new pane with video settings will appear on the right side of the screen
- In the Thumbnail field, click on the Edit thumbnail icon

- Use the seekbar playhead on the video player to move to the frame you want to use as the thumbnail, alternatively in the Thumbnail field, click on the Upload icon and select the thumbnail you want to use

It’s important to note that the custom thumbnail you select for your video or audio file in Microsoft Stream on SharePoint will be used as the cover image across Microsoft 365.

Remember, a great thumbnail can be the key to unlocking the full potential of your video or audio content. So, take the time to choose an image that truly represents your video’s message and captures the viewer’s attention. With custom thumbnails, you can make sure that your videos get the attention they deserve.

 HANDS ON tek
 M365 Admin


No comments yet