Share global navigation between site collections
Managing a global navigation between multiple site collections don’t need to be a painful and tedious task.
With the use of Manage Metadata you can easily build your navigation structure and update it globally to all site collections at once, the steps described below work for SharePoint Online and SharePoint On-Premises.

Open the Term Store Management Tool
To get the global navigation shared between site collections it needs to be first created in the global term store, to reproduce the steps in this article you must be a Term Store Administrator.
To open the Term Store Management tool, do the following:
SharePoint Online
- Sign in to Office 365
- Go to the SharePoint Admin Center
- From the left navigation click on Term Store
SharePoint On-Premises
- Open the Central Administration
- Click on Application Management
- Click on Manage Service Applications
- Locate the Manage Metadata Service and click on it
Create the Global Navigation
The steps below are the same for SharePoint Online and SharePoint Server.
- Click on the root Taxonomy and the click on New Group
- Provide a name to the new group e.g. Global Navigation
- Click on the newly created group and then click on New Term Set e.g. Navigation
- Click on the Intended Use tab
- Unckeck the option Available for Tagging
- Check the option Use this Term Set for Site Navigation and save the term set
- Click on the Term Set and then click Create Term
- Click on the Navigation tab
- On the Navigation Node Type select Simple Link or Header
Repeat the steps 7 to 9 to create your navigation structure.

Apply the global Navigation to the site collection
- On your site collection go to Site Settings
- Clink on Navigation
- For the Global Navigation select Managed Navigation
- On the Managed Navigation: Term Set click on Create Term Set, this option will create a local term set that will be only
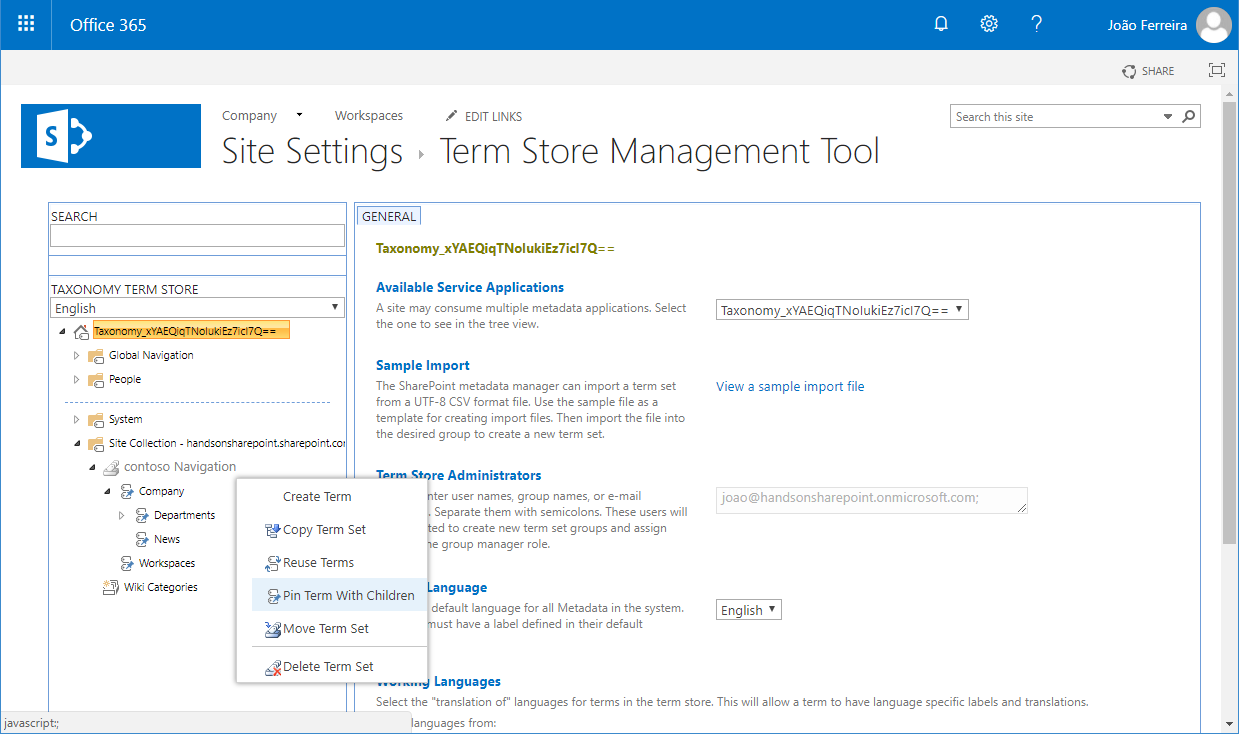
- Click on Term Store Management Tool
- Click on the newly created Term Set
- Select Pin Term with Children
- Expand the global navigation Term Set
- Select the Term to add to the navigation
available for this site collection
Repeat the steps 7 to 9 to all the navigation items.


 HANDS ON tek
 M365 Admin


June 11, 2019
Hi Ben,
Please check the gif below where I’m doing the steps 7 to 9.

Basically you need to go to each site collection where you want to get the global navigation and pin the items from the global term store defined at the tenant level.
Let me if know if it helped.
Click here to see the gif with the full resolution
August 13, 2019
Thanks João
I do the same and it works fine. But after finishing on the first site collection I receive a warning message that prompts removing the term set from other site collections navigation before moving forward.
Is it really usable for multiple site collections? If not it what is its use?
August 15, 2019
Hi Kauveh,
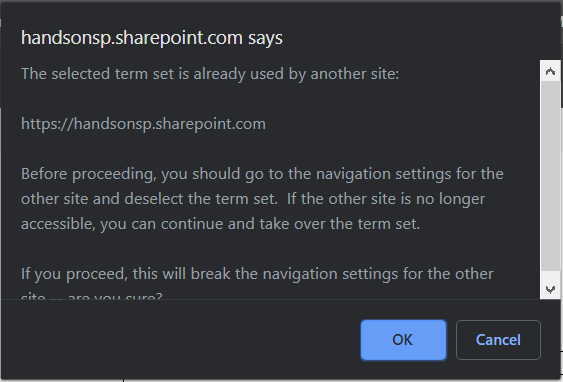
I’m assuming you are getting a message like the one in the image below, if that is the case it means that you are not pinning the items but instead applying the navigation from the global term set directly.

On the site collection where you are seeing the error make sure you follow the instructions in the article copied here.
available for this site collection
The gif image below shows first the wrong way of doing it and then the way it is explained in the article.
Please look to term item and make sure it has a pin instead of showing just the tag.
Let me know if you were able to apply the global navigation to your site collections.
September 12, 2019
Hi Ben,
You will need to enable custom scripts in each site collection to get publishing features back on SharePoint.
My friend David has an article for SharePoint online with all the features you need to activate using PowerShell, I did not tested the code on SharePoint 2019 but it should work in a similar way.
Hope this helps, have a nice day 🙂
September 13, 2019
I’m sorry I forgot to send the link but I found another article from David for SharePoint 2019