

 HANDS ON SharePoint
 HANDS ON Teams
 HANDS ON Lists
 HANDS ON tek
 M365 Admin
Highlight events on Modern SharePoint with images
Do you need to draw the attention of your Intranet users to certain upcoming events on your calendar?
If your answer is ”Yes!”, then this article explains you how to take advantage of modern SharePoint to promote events in a compelling way, using images in your intranet pages.
Modern SharePoint has a dedicated web part to display events on modern pages. However, in the back everything is stored on classic SharePoint calendars, with a few extra columns added to build the modern detail page.
For each event created through the web part, you can define an image that although used in the header of the detail page is not visible in the web part itself, making it less immediate for end users to identify and therefore less engaging.

On the other hand, with the use of the BindTuning Slider web part you can get those images in your page to help you effectively highlight the events on your landing pages.
Create the events calendar
To create an event calendar, you will need to add the events web part to your modern page.To do it follow the steps below.
- Edit your modern SharePoint page
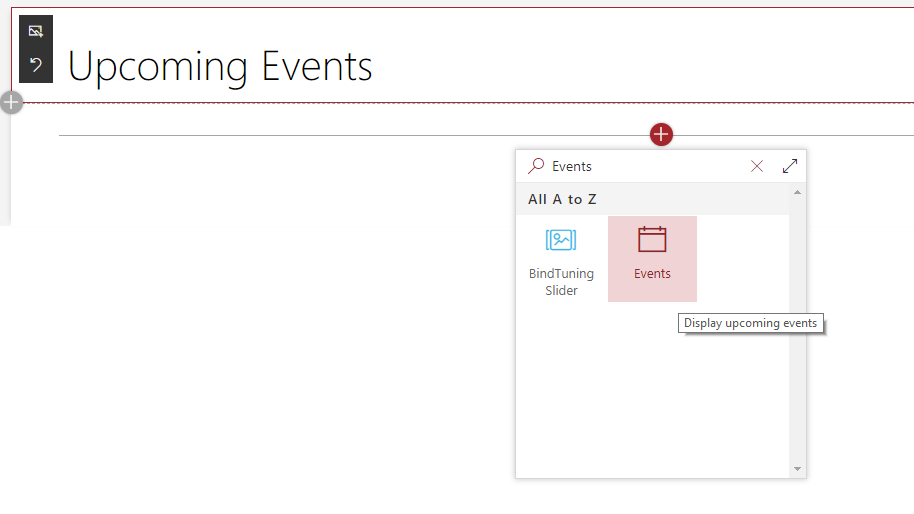
- Click on the plus (+) icon to open the web part gallery
- Search for “Events” and add the web part to the page
- Once the web part is on the page, click on Add to create your first event. The calendar where events are stored is created automatically
- Useful Tip: Open the event and copy the link address. you will need it to setup the BindTuning Slider web part later on
Create a custom view to get the upcoming events
In order to get just the upcoming events from your calendar, you will need to create a custom view that will be used by the BindTuning Slider web part. To do it follow the steps below:
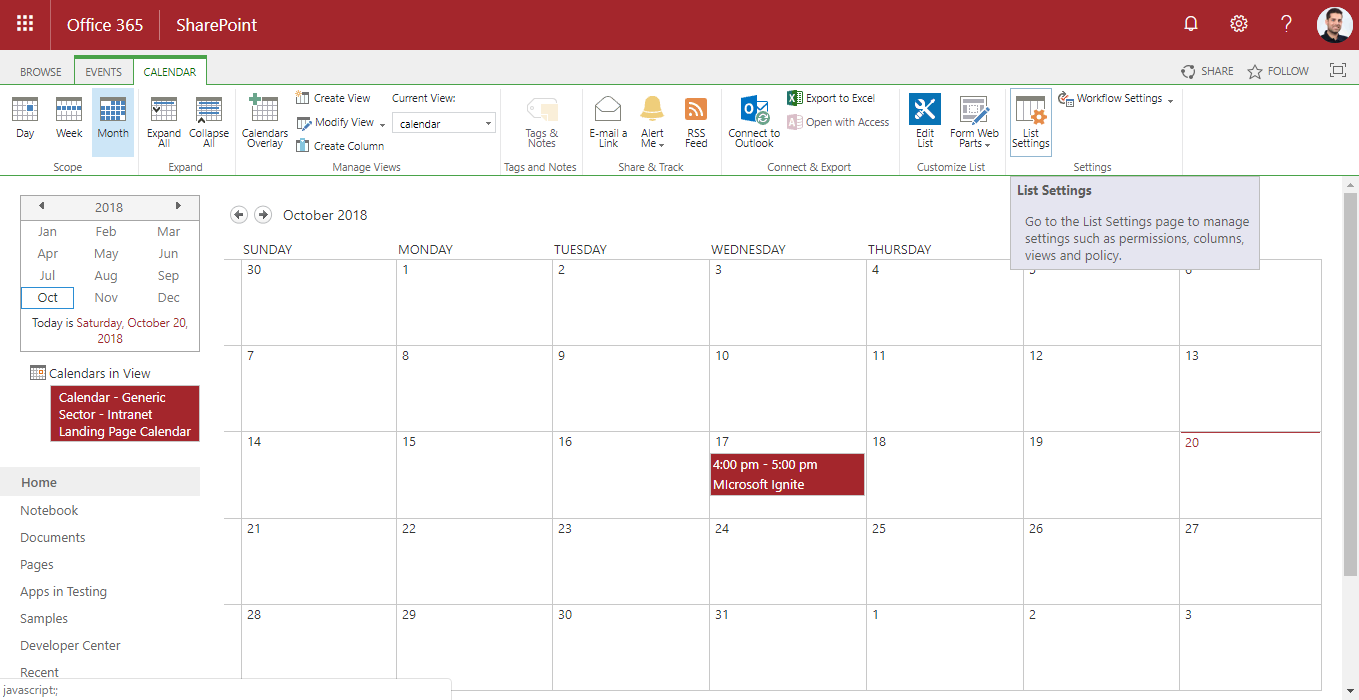
- With the calendar open, expand the Calendar tab and then click on List Settings
- Scroll down to the bottom of the page and click on Create View
- Start from an existent view and click on All Events
- On the view name text box type Upcoming Events
- On the Columns section check the Banner Url to be displayed
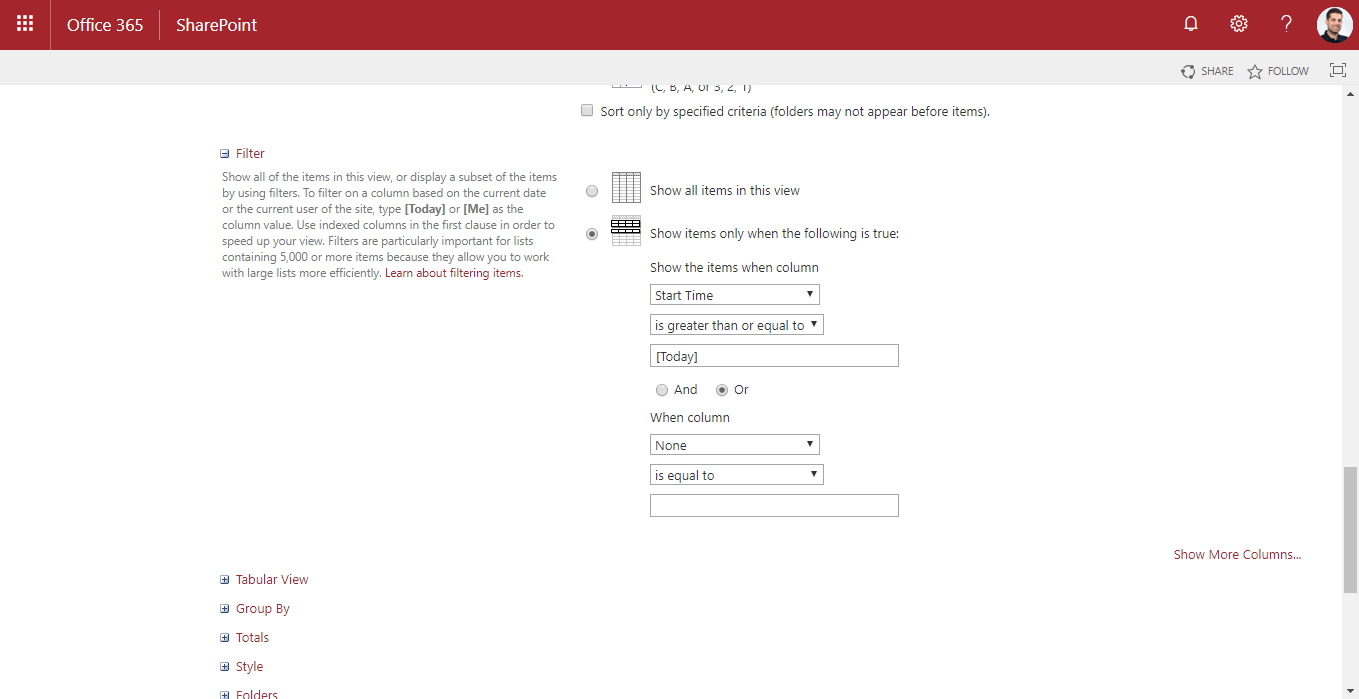
- On the Filter section define the options in line with the image below; make sure “Today” is written between brackets, as SharePoint translates this syntax to show the current day
- Click OK to save the new view
Configure the BindTuning Slider to display events
BindTuning slider is available for download here and trials are available for 30 days, so even if you don’t own the web part yet, you will be able to try it out on your environment.
Once the web part is installed on your SharePoint do the following steps:
- Edit your modern SharePoint page
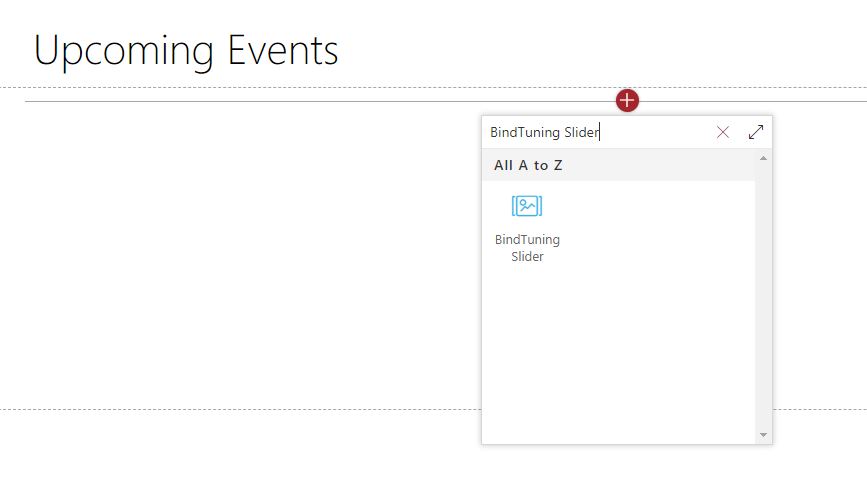
- Click on the plus (+) icon to open the web part gallery
- Search for BindTuning Slider and add the web part to the page
- Once the web part is on the page click on the pencil icon to open the property pane
- On the Click new BT Slider List section provide a name to create a list where the template for your slider will be stored and click Create List
- On the Web Part Properties section click on Manage Slider
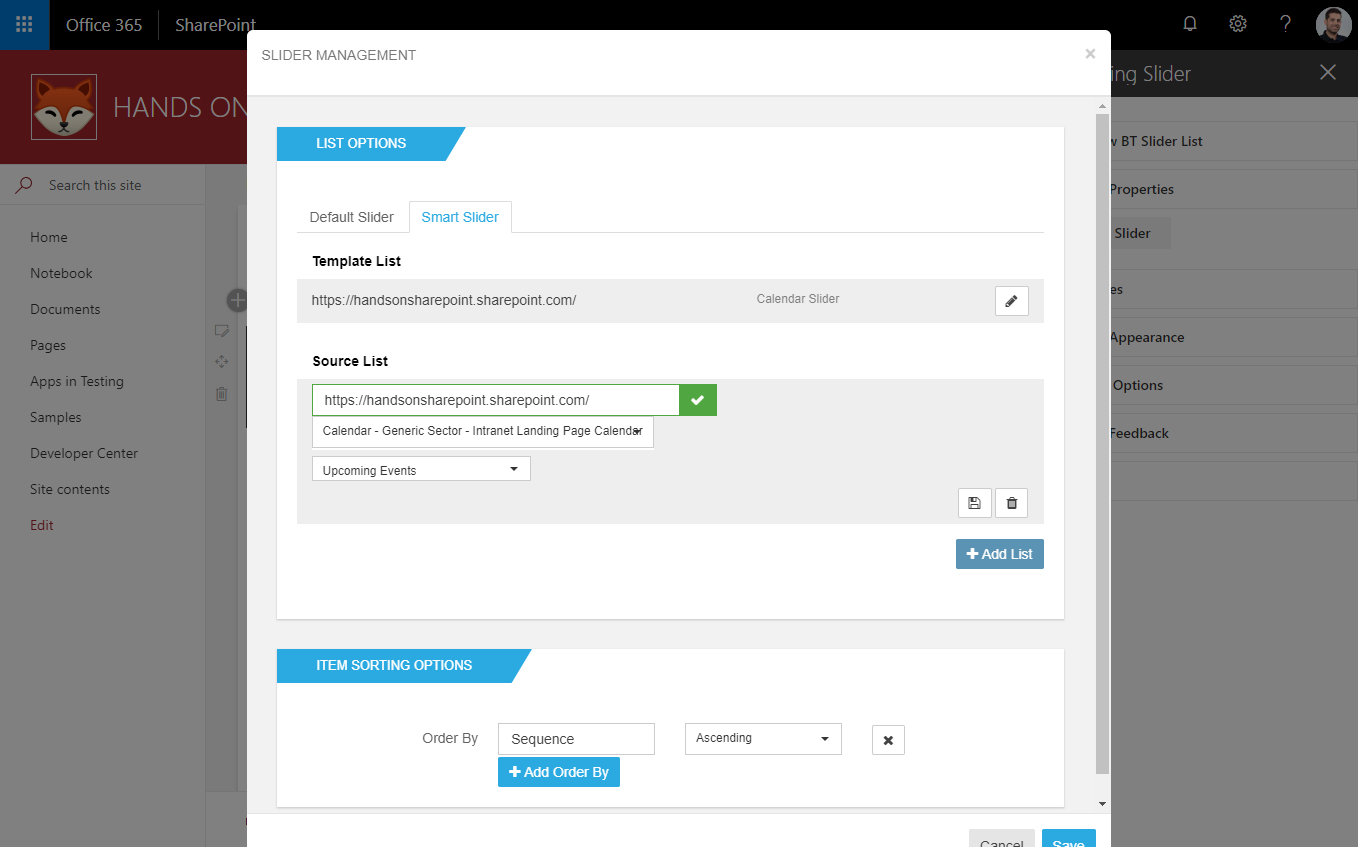
- On the List Option section click on Smart Slider – the Smart Slider functionality allows you to display data from non BindTuning lists in your slider using custom list views or CAML query
- On the Template List option select the newly created slider list: start by typing the site url and then pick the list from the lists drop down
- On the Source List option select the calendar where the events are stored: start by typing the site url and picking the name of the calendar from the drop down; then select the custom view created above (named Upcoming Events)
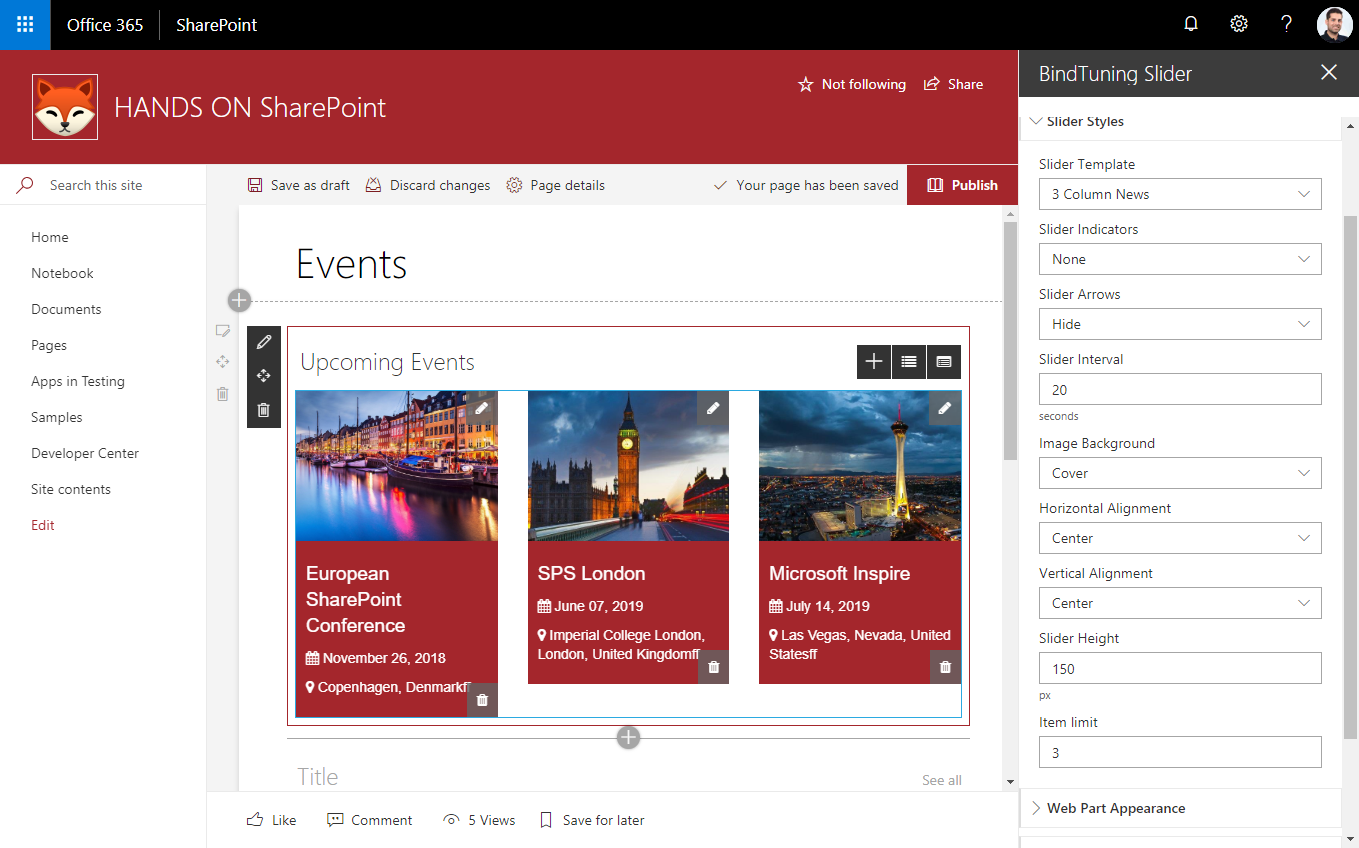
- On the Slider Styles select the slider template 3 columns news. The web part is very flexible and allows different customizations but if you wish to achieve the same result shown in the animation, you should use the settings showing in the image below
- Click on the plus (+) icon located in the web part chrome
- On the Caption Settings section select Image as slide background and type {{BannerURL}} in the text box. This sintax means that for this placeholder the web part will use what is stored in the BannerUrl column
- For the caption text type the markdown code below (if you use the code below, you’ll need to define a solid background color e.g. #a4262c)
### {{Title}} #ffffff fa-calendar_1 {{EventDate}} #ffffff fa-map-marker_1 {{Location}} #ffffff [View Details](https://handsonsharepoint.sharepoint.com/_layouts/15/Event.aspx?ListGuid=65dde3b4-6c8a-4db1-88c9-38242af5b2da&ItemId={{ID}}){@btnSize:full@btnTarget:blank} - Replace the link for the event by the link you copied on step #5 at the top of the article
- Replace the event id number by {{ID}} to generate dynamic links for each event displayed in the slider
If everything went as planned, the result should be similar to the animation below. For reference, it is displaying, in the same page, both the BindTuning Slider and the default SharePoint Events web part.


October 23, 2018
[…] Highlight events on Modern SharePoint with images – João Ferreira (BindTuning) […]
August 9, 2019
Hi Annie,
Can you please provide me more information about your issue so I can understand it better?
The modern events are created inside the Site Pages library on the Site Collection, the product features in this article is able to show them per site collection individually.
looking forward to hear back from you.