

 HANDS ON SharePoint
 HANDS ON Teams
 HANDS ON Lists
 HANDS ON tek
 M365 Admin
How to use SharePoint Spaces in school to create interactive classes
SharePoint Spaces is a mixed reality vision that brings 2D and 3D e experiences to your intranet creating new ways to interact with data or as explained in this article interactives classes for schools.
Based on the questions that I received about SharePoint Spaces I can tell that people is a bit skeptical about investing time in this new feature, either because of the 3D experience or because it’s still in preview.
There is nothing to worry about SharePoint Spaces, even though it is 3D it doesn’t mean that is mandatory to use VR glasses to interact with it and about the final version it will happen before the end of 2020 as announced in the last Microsoft Ignite.

How to create interactive experiences for schools using SharePoint Spaces
With the pandemic the remote learning became the new normal for a lot of students and teachers, this brought limitations to the learning process as the tools that are used to teach are not available to all the students as they used to be.
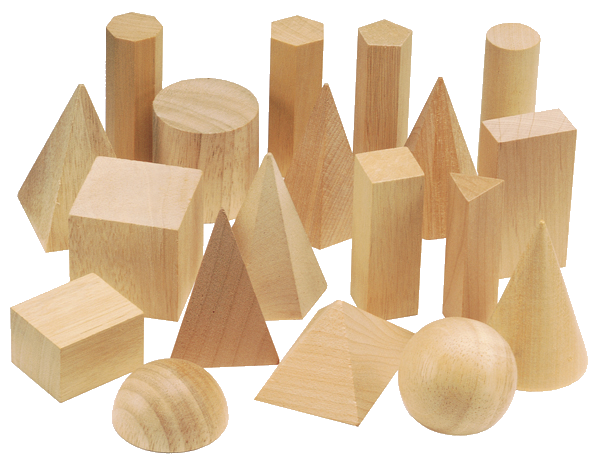
I still remember of learning the geometric solids with wood representations, but I don’t think that is an option nowadays. Even for students not having remote classes it’s not recommended to share this kind of objects to avoid Covid-19 propagation.
With all this said let’s see how the wood solids can be replaced by SharePoint Spaces:
- In order to get Spaces on your environment you first need enable the Spaces feature, you can find instructions on how to do it here. If you are an admin and want to enable SharePoint Spaces globally for everyone to use then follow the instructions available here.
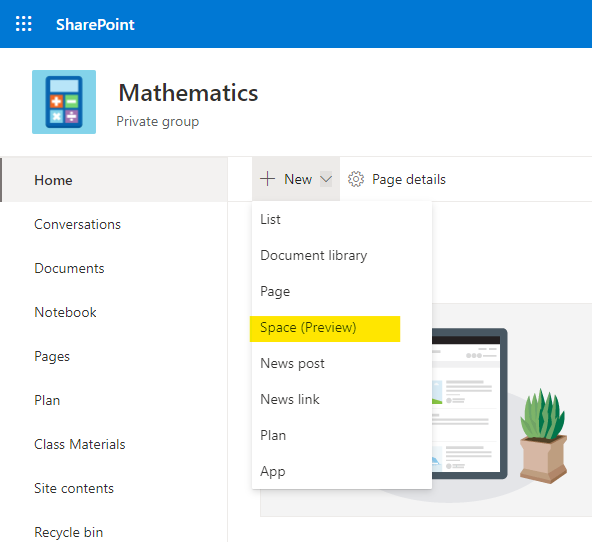
- On the site collection where you want to create the Space click onNewand then click onSpaces (Preview)
- Provide a name and a description for your Space and select the Structure. The structure will be stage for your content and can be modified at any time while building the Space.
- Before adding content to your scene check out what you can do with, to edit the space properties click on theSpace designin the toolbar. From the settings pane you will be able to define:
- The original details:Name, Description and Structure
- The background:Here you can use a solid color, one of the 360º images available or use your own 360º image
- Welcome message:You can select an audio file to welcome who opens the space
- Ambient sound:There are 5 ambient sounds available by default and you can also upload your own
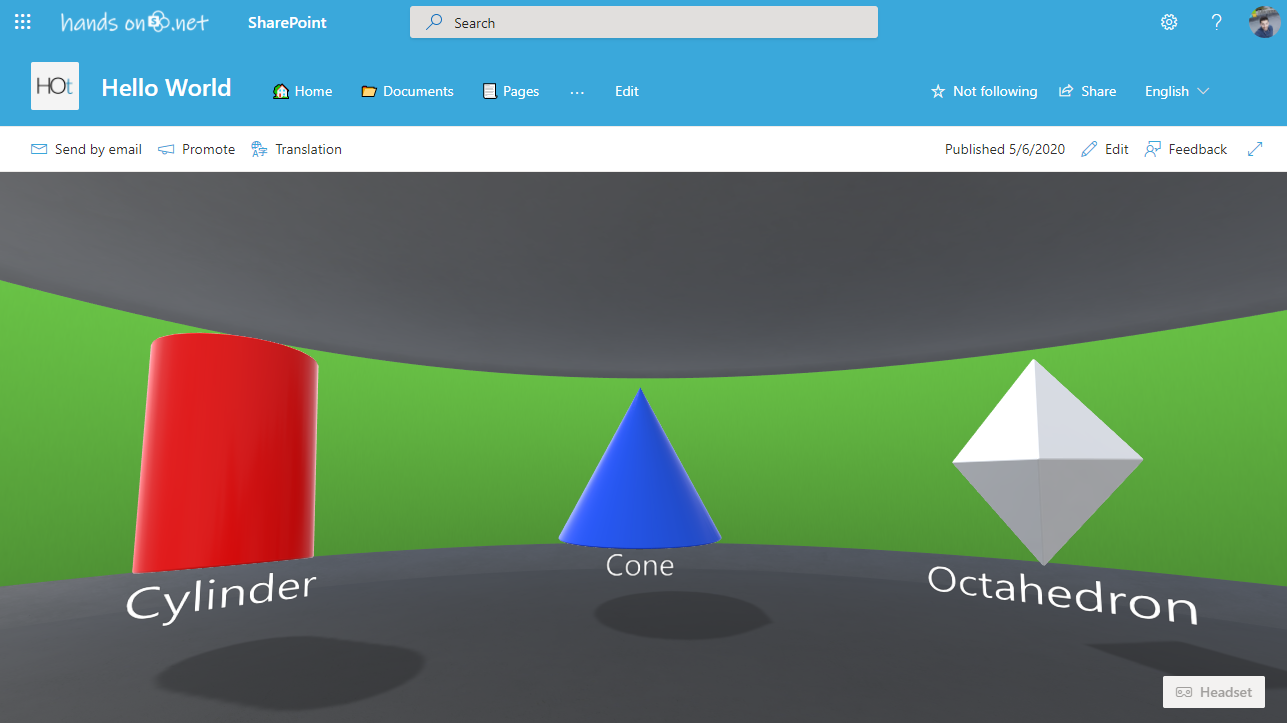
- Click on the plus sign as shown in the following picture and then select the 3D Object category
- Place the object in the scene and then open the 3D shapes category, if you would like to add a label to each solid you do it using the text web part
- Repeat the process for each solid that you want your students to learn
Replacing the old teaching methods by new and interactive experience doesn’t need to be difficult and with SharePoint Spaces the sky is the limit.
All you have to do now to engage your students is make the space available inside Microsoft Teams, the process is fairly easy and is described in here.
Still have doubts about SharePoint Spaces and how to implement this scenario? Have a look at the following video and enjoy this new learning experience brought by SharePoint and Microsoft Teams.


No comments yet