

 HANDS ON SharePoint
 HANDS ON Teams
 HANDS ON Lists
 HANDS ON tek
 M365 Admin
Save publishing site as template – The right way using PnP Provisioning
…if you are familiar with remote provisioning technics which I’ve been promoting for years, this is a kind of similar model. You create a site, out of the box site and then apply actions on top of it so you don’t break the site by using something evil like site definitions or web templates…
Save your newly created sites as templates is one of the best features on SharePoint, it saves you a lot of time and work if you want to replicate them in your environment but this is not the best way of doing it as explained in the quote above specially if you are using Publishing features.
In this article I’ll explain you how to save and deploy a Publishing site using the PnP PowerShell and the PnP Provisioning.
PnP PowerShell
The PnP PowerShell encapsulates all the complexity of CSOM and Rest APIs and provides over 240 commands to easily modify your existent site. In this article I’ll not take advantage of all the commands, instead I’ll use only the ones related with the provisioning engine.
To get the latest version of the PnP PowerShell click here.
PnP Provisioning
The PnP Provisioning Engine allows you to model Content Types, Site Columns, List Definitions, Pages and much more however it does not extract any of the content from your site except for the home page.
Get site template
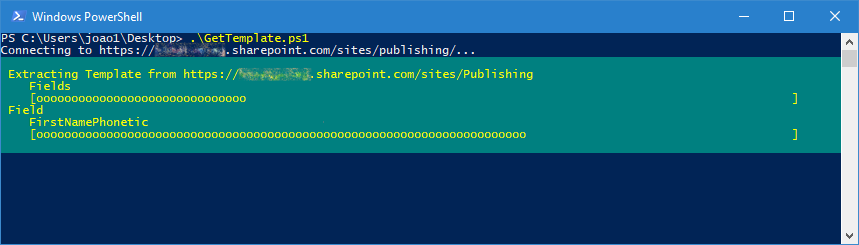
The provisioning starts by establishing a connection to the site that you want to save using the command:
Connect-PnPOnline -Url "https://contoso.sharepoint.com/sites/publishing" -Credentials WCMStoredCredentials
If you have multifactor authentication enabled in your tenant the above instruction might fail, instead you can use the command:
Connect-PnPOnline -Url "https://contoso.sharepoint.com/sites/publishing" -UseWebLogin
The next step is to extract the template saving the custom master pages and the publishing files, if you are not using any of those you can remove the options PersistBrandingFiles and PersistPublishingFiles.
Get-PnPProvisioningTemplate -Out "C:\Path\to\template.xml" -PersistBrandingFiles -PersistPublishingFiles;
Depending of the content of your site it might take a few minutes to generate the template, once the process finishes you will get all the master pages, the publishing assets and an XML file with your site definition.
Bellow you have the complete PowerShell script that you can use to download the template, make sure you update the variables to your own values before executing it.
# Variables definition
$tenant = "contoso";
$sourceSite = "/sites/department/template/";
$templateFile = "C:\path\to\file\temnplate.xml";

# Office 365 Login
$webUrl = "https://{0}.sharepoint.com{1}/" -f $tenant, $sourceSite;
Write-Output $("Connecting to {0}" -f $webUrl);
Connect-PnPOnline -Url $webUrl -Credentials WCMStoredCredentials;
#use the line bellow to connect if you are using multi factor authentication
#Connect-PnPOnline -Url $webUrl -UseWebLogin;

# Save Template
Write-Output "Saving PnP template";
Get-PnPProvisioningTemplate -Out $templateFile -PersistBrandingFiles -PersistPublishingFiles;
Set site template
The process to apply the site template starts with the login in your tenant using the command:
Connect-PnPOnline -Url "https://contoso.sharepoint.com/sites/publishing" -Credentials WCMStoredCredentials
If you have multifactor authentication enabled in your tenant the above instruction might fail, instead you can use the command:
Connect-PnPOnline -Url "https://contoso.sharepoint.com/sites/publishing" -UseWebLogin
The next step is get the site context and apply the template to it, if you don’t have the site created yet you can also create it using the PnP PowerShell.
$web = New-PnpWeb -Title "Title" -Url "fromTemplate" -Description "PnP Site" -Locale 1033 -Template "BLANKINTERNET#0"
Finally run the command bellow to apply the template to your site, it will try to figure out if the assets you are trying to provision already exist in the site. If it does it will be modified to match the definition in the template if it doesn’t it will be created.
Apply-PnPProvisioningTemplate -Web $web -Path "C:\Path\to\template.xml"
As a complement you can enable the log by using the command bellow, it might be useful if something goes wrong during the template application.
Set-PnPTraceLog -On -LogFile " C:\Path\to\log.xml " -Level Debug
Bellow you have the complete PowerShell script that you can use to apply the template, make sure you update the variables to your own values before executing it.
# Define variables
$tenant = "contoso";
$targetSite = "/sites/department/template/";
$templateFile = "C:\path\to\file\temnplate.xml";
$siteTitle = "New Publishing Site";
$siteDescription = "Publishing site created with PnP Provisioning";
$siteUrl = "PnPSite";

# Office 365 Login
$webUrl = "https://{0}.sharepoint.com{1}/" -f $tenant, $targetSite;
Write-Output $("Connecting to {0}" -f $webUrl);
Connect-PnPOnline -Url $webUrl -Credentials WCMStoredCredentials;
#use the line bellow to connect if you are using multi factor authentication
#Connect-PnPOnline -Url $webUrl -UseWebLogin;

# Get site context
Write-Output $("Getting site context {0}" -f $siteTitle);
$newSite = (Get-PnPWeb).ServerRelativeUrl + "/" + $siteUrl

# If the site does not exist creates it
if((Get-PnPSubWebs).ServerRelativeUrl -contains $newSite){
    #Get site context
    $web = Get-PnPWeb -Identity $newSite
} else {
    #Creates the publishing site and gets context
    $web = New-PnpWeb -Title "$siteTitle" -Url "$siteUrl" -Description "$siteDescription" -Locale 1033 -Template "BLANKINTERNET#0"
}

# Apply template
Write-Output $("Applying PnP template [{0}] to site [{1} ({2})]" -f $templateFile, $web.Title, $web.Url);
Set-PnPTraceLog -On -LogFile "C:\path\to\file\log.txt" -Level Debug
Apply-PnPProvisioningTemplate -Web $web -Path $templateFile
Conclusion
The PnP provisioning is an extremely powerful and flexible tool, it might not get by default all the data that you want to incorporate in your template but with a few tweaks to the XML file you can easily add it.
Keep in mind that the instructions provided in this article are not for publishing sites only, if you are considering the creation of site templates this is the approach you should follow, it supports both classic SharePoint sites and Modern sites.
I recommend you to watch Erwin van Hunen showing all the potential of the PnP PowerShell and the Provisioning in the video bellow.


May 29, 2018
thanks alot for the sharing. it helped me alot.
however i got the below error i deploy “Apply-PnPProvisioningTemplate xxx”
apply-PnPProvisioningTemplate : Invalid field name. {746bb255-b0f7-47d5-9a3e-1c8e52468420}
https://iba2016.sharepoint.com/sites/deploytemplate
At line:1 char:1
+ apply-PnPProvisioningTemplate .\template.xml
+ ~~~~~~~~~~~~~~~~~~~~~~~~~~~~~~~~~~~~~~~~~~~~
+ CategoryInfo : WriteError: (:) [Apply-PnPProvisioningTemplate], ServerException
+ FullyQualifiedErrorId : EXCEPTION,SharePointPnP.PowerShell.Commands.Provisioning.ApplyProvisioningTemplate
could you kindly help please?
cheers
coco
May 30, 2018
Hi Coco,
I wasn’t able to replicate the issue on my side but I search online and seems this is a bug from the engine that is already reported in the GitHub repo.
https://github.com/SharePoint/PnP-Sites-Core/issues/1788
I recommend you to give your input and feedback there it can help the developers to solve it faster.
May 30, 2018
hello Joao,
thanks a lot for your kind reply.
I solved the issue by modifying the exported XML
cheers
thanks a lot for the sharing it was helpful!
coco
June 17, 2018
I am using PnP Library to apply a template to existing sites(with new changes- such as adding new site fields, content types, modifying views etc). We have 100+ site collections, where I need to apply the template.
Depending on the number of changes, for each site it is taking 5-10 minutes. As the number of sites are more, the deployment process is taking lot of time to deploy the changes to existing sites.
Is there a better approach, where I can apply the template to multiple sites in a fast manner?
June 17, 2018
Hi,
The more complex your template is, longer it will take to be applied.
My suggestion is to run it in parallel, execute multiple instances of the script at once.
June 20, 2018
Thx you ! Somehow it doesnt create the home page for me. Could you share some xml code you have in your export so that i compare ?
I personnally had to remove some xml inside the export to get it working.
Image library on a publishing site for example.
Which option do you use to create documents by default in your pnp template ? pnp commands i guess ?
Good day !!!
June 27, 2018
Hi Jeff,
I don-t have an XML to share but I can get it if you still need it,
When I need to complement the templates with content I usually create a separate script that I execute after the template and it will upload the documents or fill the lists.
About the documents I’m not sure if you can reference them directly in the XML like list items, I’ll investigate this further and I’ll share it with you.
June 20, 2018
Im using PNP 2016 by the way
July 11, 2018
Hi
This is a great feature; the only drawback, as I see it, is the issue mentioned near the beginning of the article – that it only brings over the Home page.
Is there a method to separately export and then import the additional pages and associated resources?
Many thanks
Conan
March 26, 2019
Hi Arvind,
I’m not sure if I understood correctly your question, but anyway here is my tip.
You can install the page layouts in all 3 environments before running the template, this way the pages will pickup the correct page layout.
September 11, 2019
Hi Ferreira,
I followed your code and its working exactly same. Can you suggest me how to achieve the below requirements.
1. I created the new site collection and applied PnP provisioning template.
2. Now i want to create a few pages and i will get the all the page names from List.
3. How can i create all the modern pages and adding the webparts to those pages by using PnP
September 11, 2019
Hi Rajesh,
Yesterday there was another reader with the same issue and we found out that the PnP PowerShell version he had installed in his computer was outdated and no longer supported. Here you can find the latest version of PnP PowerShell.
Also make sure you download the latest version of zip from the article I’ve made an update to the PowerShell script to make it work with all scenarios.
1 – To create a new site collection click on the waffle icon in the suite bar and then SharePoint, click on new site and then select communication site.
Fill the form and copy the URL of your newly created site collection.
2 – You then should create the pages manually and add the lists to them using the list web part, however the template I’ve built have links in the landing page to access to all the lists.
3 – To create a new template with all the pages you can follow the instructions I wrote in this article.
Hope this helps you, have a nice day 🙂