

 HANDS ON SharePoint
 HANDS ON Teams
 HANDS ON Lists
 HANDS ON tek
 M365 Admin
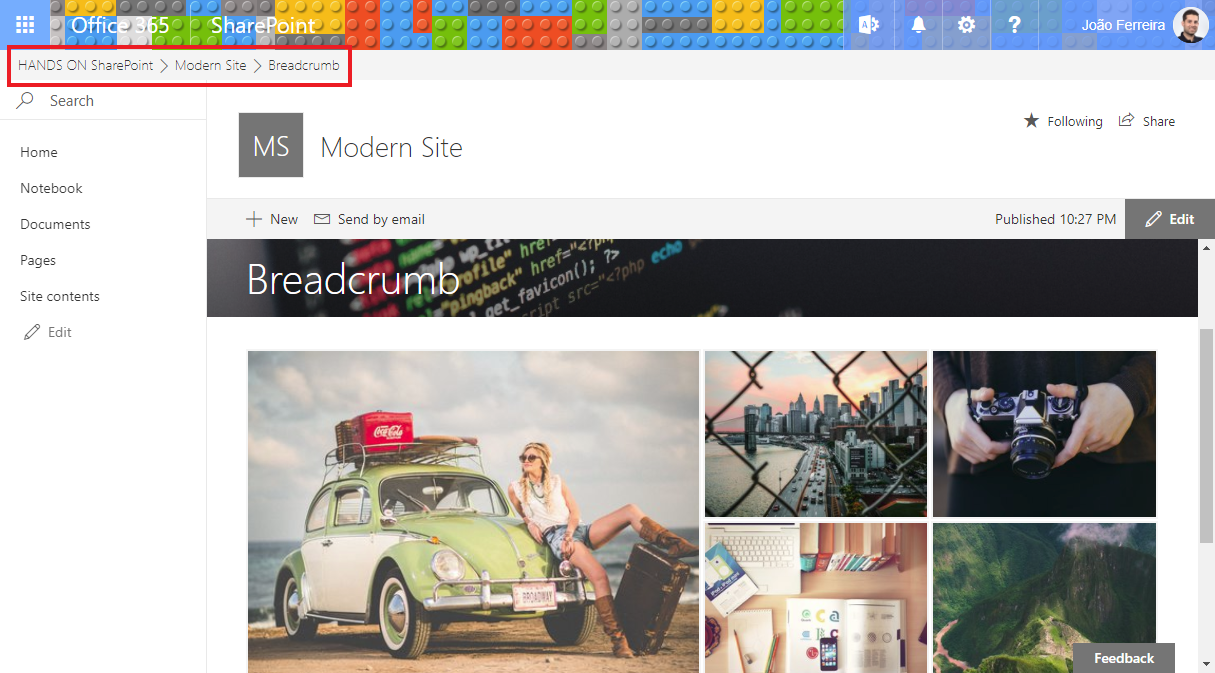
Build a breadcrumb using SPFx extensions
A few months ago, I’ve built a solution to add the breadcrumb navigation to all SharePoint sites and pages. While that solution still works fine on SharePoint 2013, 2016 and on the classic experience of SharePoint online it no longer works for the modern sites.
In the previous solution I used a script link to add the breadcrumb globally to the site collection, this functionality was disabled by Microsoft in the modern experience and it was replaced by the SPFx Extensions.
The SPFx Extensions are client-side components that run inside the context of the SharePoint and provide the possibility to manipulate the page DOM to add or modify components.
In this article I’ll provide you the final solution but I’ll also explain step by step how I migrated the code from the old solution to the SPFx.
If you are new to the SPFx development you will need to setup your machine first, all the instructions can be found in this link.
Create the extension project
- Create a folder with the name of the project e.g. breadcrumb-extension
- Open the console window in the new directory
- Type the command
yo @microsoft/sharepoint - When prompted:
- Accept the default app-extension as your solution name, and press Enter.
- Choose SharePoint Online only (latest), and press Enter.
- Choose Use the current folder, and press Enter.
- Choose Y to make the extension available to be added without activating any features.
- Choose Extension as the client-side component type to be created.
- Choose Application Customizer as the extension type to be created.
- Provide a name to the extension. e.g. breadcrumb
- Provide a description to the extension. e.g. breadcrumb for modern pages

- The download of all the requirements might take a few minutes, once it’s done you will see the message bellow indicating the success of the operation.
- Type code . to open the project (this will open visual studio code but you can use another editor). The structure of the extension project is like the SPFx web parts projects.
Build the extension
In this project I’ll reuse and adapt the code from my previous article, it was modified from the original version that is available in the PNP git hub repository.
The breadcrumb is built using JSOM but the dependencies to use it are not loaded by default on modern pages. To use JSOM with SPFx solutions you need to explicitly load it first. You can find detailed information about this process in this link.
In this article I’ll follow the declarative approach which requires the absolute path to the JS files.
Reference JSOM Declaratively
To reference JSOM declarative, the first step is to register all the JSOM API resources as external scripts. On your solution go to the folder config and open the file config.json, add the following code to the externals section.
  "externals": {
    "sp-init": {
      "path": "https://yourtenant.sharepoint.com/_layouts/15/init.js",
      "globalName": "$_global_init"
    },
    "microsoft-ajax": {
      "path": "https://yourtenant.sharepoint.com/_layouts/15/MicrosoftAjax.js",
      "globalName": "Sys",
      "globalDependencies": [
        "sp-init"
      ]
    },
    "sp-runtime": {
      "path": "https://yourtenant.sharepoint.com/_layouts/15/SP.Runtime.js",
      "globalName": "SP",
      "globalDependencies": [
        "microsoft-ajax"
      ]
    },
    "sharepoint": {
      "path": "https://yourtenant.sharepoint.com/_layouts/15/SP.js",
      "globalName": "SP",
      "globalDependencies": [
        "sp-runtime"
      ]
    }
  }
Install TypeScript Typings for SharePoint JSOM
The next step is to install and configure TypeScript typings for SharePoint JSOM. This allows you to benefit from TypeScript’s type safety features when working with SharePoint JSOM.
- From the console, execute the following command within your project directory
npm install @types/microsoft-ajax @types/sharepoint --save-dev - On your solution open the tsconfig.json file, and in the types property, right after the webpack-env entry, add references to microsoft-ajax and sharepoint.
  "compilerOptions": {
    "types": [
      "es6-promise",
      "es6-collections",
      "webpack-env",
      "microsoft-ajax",
      "sharepoint"
    ]
  }
Reference SharePoint JSOM Scripts in the solution code
To load the SharePoint JSOM scripts in your SPFx component, you must reference them in the component’s code.
On your solution go to src/extensions/breadcrumb/ and open the file BreadcrumbApplicationCustomizer.ts, after the last import add the following code:
require('sp-init');
require('microsoft-ajax');
require('sp-runtime');
require('sharepoint');
Render Placeholder
- Add the
PlaceholderContentandPlaceholderNameto the import section - Inside the extension class create the variable
private _topPlaceholder: PlaceholderContent | undefined; - Create a new _renderPlaceHolders private method, all the HTML code for the breadcrumb will be generated by this method.
- On the _renderPlaceHolders method paste the code bellow:
// Handling the top placeholder if (!this._topPlaceholder) { this._topPlaceholder = this.context.placeholderProvider.tryCreateContent( PlaceholderName.Top, { onDispose: this._onDispose }); // The extension should not assume that the expected placeholder is available. if (!this._topPlaceholder) { console.error('The expected placeholder (Top) was not found.'); return; } if (this.properties) { if (this._topPlaceholder.domElement) { this._topPlaceholder.domElement.innerHTML = ` `; this.LoadSiteBreadcrumb(this); } } } - Add the functions bellow to the extension class, this is the code from the previous version, it was slightly modified to be compliant with TypeScript. If you used the previous version you will notice that the functions declaration is now different and receive 2 arguments. Since the previous version was written in plain JavaScript the code doesn’t need any other modification, all JavaScript code is valid TypeScript code.
private LoadSiteBreadcrumb(context): void {
    var breadCrumbNode;
    var clientcontext = SP.ClientContext.get_current();
    var site = clientcontext.get_site();
    var currentWeb = clientcontext.get_web();
    clientcontext.load(currentWeb, 'ServerRelativeUrl', 'Title', 'ParentWeb', 'Url');
    clientcontext.load(site, 'ServerRelativeUrl');
    clientcontext.executeQueryAsync(
    function () {
        var breadcrumbWrapper = document.createElement('div');
        breadcrumbWrapper.className = "ms-Breadcrumb";
        breadcrumbWrapper.innerHTML = '';

        var breadCrumbNode = document.getElementById('breadcrumbSite');
        var Custombreadcrumb = document.getElementById('DeltaPlaceHolderMain');
        var breadCrumbNode = document.getElementById('breadcrumbSite');
        if (document.location.pathname.indexOf('SitePages') != -1 || document.location.pathname.indexOf('Pages') != -1) {
            var li = document.createElement('li');
            li.className = "ms-Breadcrumb-listItem";
            if (document.title.split('-').length > 1) {
                li.innerHTML = '' + document.title.split('-')[1].trim() + ''
            } else {
                li.innerHTML = '' + document.title.trim() + ''
            }
            breadCrumbNode.insertBefore(li, breadCrumbNode.childNodes[0]);
        }
        else if (document.location.pathname.indexOf('_layouts/15/') != -1) {
            var li = document.createElement('li');
            li.className = "ms-Breadcrumb-listItem";
            li.innerHTML = '' + document.title + ''
            breadCrumbNode.insertBefore(li, breadCrumbNode.childNodes[0]);
        }

        var li = document.createElement('li');
        li.className = "ms-Breadcrumb-listItem";
        li.innerHTML = '' + currentWeb.get_title() + ''
        if (Custombreadcrumb != null) {
            breadCrumbNode.insertBefore(li, breadCrumbNode.childNodes[0]);
        }
        if (site.get_serverRelativeUrl() !== currentWeb.get_serverRelativeUrl()) {
            context.RecursiveWebBreadcrumb(context, currentWeb.get_serverRelativeUrl());
        }
    }, this.fail);
}

public RecursiveWebBreadcrumb(context, siteUrl): void {
  var Custombreadcrumb = document.getElementById('contentBox');
  var breadCrumbNode = document.getElementById('breadcrumbSite');
  var clientcontext = new SP.ClientContext(siteUrl);
  var site = clientcontext.get_site();
  var currentWeb = clientcontext.get_web();
  clientcontext.load(currentWeb, 'ServerRelativeUrl', 'Title', 'ParentWeb', 'Url');
  clientcontext.load(site, 'ServerRelativeUrl');
  clientcontext.executeQueryAsync(function () {
	  if (site.get_serverRelativeUrl() !== currentWeb.get_serverRelativeUrl()) {
		  var li = document.createElement('li');
		  li.className = "ms-Breadcrumb-listItem";
		  li.innerHTML = '' + currentWeb.get_title() + ''
		  var Custombreadcrumb = document.getElementById('contentBox');
		  breadCrumbNode.insertBefore(li, breadCrumbNode.childNodes[0]);
		  context.RecursiveWebBreadcrumb(context, currentWeb.get_parentWeb().get_serverRelativeUrl());
	  } else {
		  var li = document.createElement('li');
		  li.className = "ms-Breadcrumb-listItem";
		  li.innerHTML = '' + currentWeb.get_title() + ''
		  breadCrumbNode.insertBefore(li, breadCrumbNode.childNodes[0]);
	  }
  }, this.fail);
}

private fail(): void {
	console.log('Unable to load SharePoint BreadCrumb');
}
Format the breadcrumb
Since this project is focused in the code migration I’ll will the original css file instead of the scss used by the SPFx solutions.
- Create a new Breadcrumb.css file inside the src folder of your project
- Add the code bellow to the css file
.ms-dialog .ms-Breadcrumb { display: none; } .ms-Breadcrumb { margin: 0 0 10px 0; } li.ms-Breadcrumb-listItem:first-child a { padding-left: 0; } .ms-Breadcrumb.is-overflow .ms-Breadcrumb-overflow { display: inline } .ms-Breadcrumb-chevron { font-size: 17px; color: #666; vertical-align: top; margin: 10px 0 } .ms-Breadcrumb-list { display: inline; white-space: nowrap; padding: 0; margin: 0 } .ms-Breadcrumb-list .ms-Breadcrumb-listItem { list-style-type: none; vertical-align: top; margin: 0; padding: 0; display: inline-block } .ms-Breadcrumb-list .ms-Breadcrumb-listItem:last-of-type .ms-Breadcrumb-chevron { display: none } .ms-Breadcrumb-overflow { display: none; position: relative; margin-right: -4px } .ms-Breadcrumb-overflow .ms-Breadcrumb-overflowButton { font-size: 12px; display: inline-block; color: #0078d7; margin-right: -4px; padding: 12px 8px 3px; cursor: pointer } .ms-Breadcrumb-overflowMenu { display: none; position: absolute } .ms-Breadcrumb-overflowMenu.is-open { display: block; top: 36px; left: 0; box-shadow: 0 0 5px 0 rgba(0,0,0,.4); background-color: #fff; border: 1px solid #c8c8c8; z-index: 5 } .ms-Breadcrumb-overflowMenu:before { position: absolute; box-shadow: 0 0 5px 0 rgba(0,0,0,.4); top: -6px; left: 6px; content: ' '; width: 16px; height: 16px; -webkit-transform: rotate(45deg); transform: rotate(45deg); background-color: #fff } .ms-Breadcrumb-overflowMenu .ms-ContextualMenu { border: none; box-shadow: none; position: relative; width: 190px } .ms-Breadcrumb-overflowMenu .ms-ContextualMenu.is-open { margin-bottom: 0 } .ms-Breadcrumb-itemLink,.ms-Breadcrumb-overflowButton { text-decoration: none; outline: transparent } .ms-Breadcrumb-itemLink:hover,.ms-Breadcrumb-overflowButton:hover { background-color: #f4f4f4; cursor: pointer } .ms-Breadcrumb-itemLink:focus,.ms-Breadcrumb-overflowButton:focus { outline: 1px solid #767676; color: #000 } .ms-Breadcrumb-itemLink:active,.ms-Breadcrumb-overflowButton:active { outline: transparent; background-color: #c8c8c8 } .ms-Breadcrumb-itemLink { color: #333; font-family: Segoe UI Light WestEuropean,Segoe UI Light,Segoe UI,Tahoma,Arial,sans-serif; font-size: 14px; font-weight: 400; display: inline-block; padding: 0 4px; max-width: 160px; white-space: nowrap; text-overflow: ellipsis; overflow: hidden } .ms-Breadcrumb span:hover{ cursor: default; background:none; } .ms-Breadcrumb a:hover{ text-decoration: none; } .ms-Breadcrumb a, .ms-Breadcrumb a:visited{ color: #23527c; } .ms-Breadcrumb-itemLink { font-size: 14px; } li.ms-Breadcrumb-listItem i { font-size: 14px; margin: 4px 0; } #breadcrumbWrapper{ padding: 5px 18px 2px 18px; background-color: #f4f4f4; } - Open the BreadcrumbApplicationCustomizer.ts file and add the import of the CSS file to the import section
import './Breadcrumb.css';
Run SPFx extensions
The SharePoint Framework Extensions cannot be tested on the local workbench, you’ll need to test them against a live SharePoint Online site.
- Compile your code running the command gulp serve –nobrowser
- On your project go to the src folder, open the manifest.json and copy the id value
- To test your extension go to a modern list view page in your SharePoint environment and add the following query string to the URL, replade the ##id## by the id of your solution
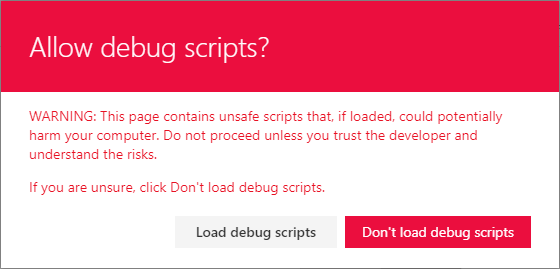
- Choose load debug scripts
- At the top of your site you should see the breadcrumb

?loadSPFX=true&debugManifestsFile=https://localhost:4321/temp/manifests.js&customActions={"##id##":{"location":"ClientSideExtension.ApplicationCustomizer","properties":{"testMessage":"Hello as property!"}}}
Make the breadcrumb available to all the users
To get the breadcrumb available to all the users it needs to be packaged and installed in the SharePoint Online, to accomplish this follow the steps bellow.
Create CDN to host your extension files
The script files need to be hosted in a CDN, in this article I’ll create a public CDN on SharePoint.
The steps bellow requires the use of SharePoint Management Shell, you can get the latest version from this link.
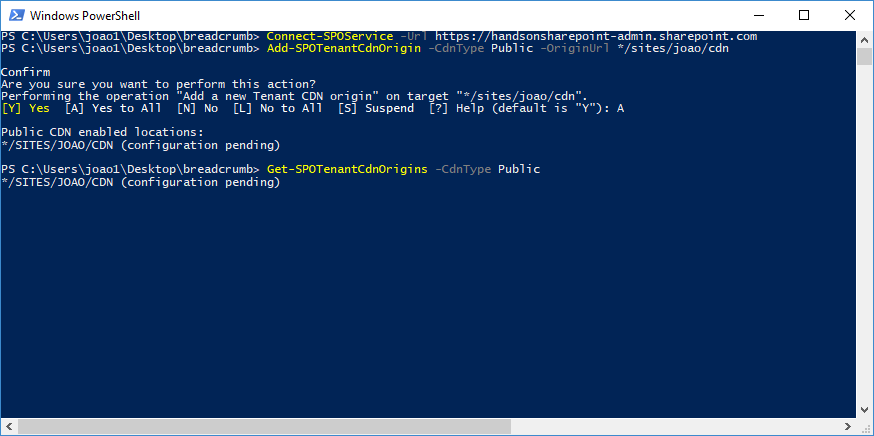
- On your console execute the command
Connect-SPOService -Url https://yourtenant-admin.sharepoint.com - Enable the public CDN by running this command
Set-SPOTenantCdnEnabled -CdnType Public -Enable $true - On your SharePoint create a new library to host the files e.g. cdn
- Make the library a CDN by running the command
Add-SPOTenantCdnOrigin -CdnType Public -OriginUrl */cdn - The creation of the CDN can take up to 15 minutes to check the status of the process run the command
Get-SPOTenantCdnOrigins -CdnType Public
Package and install solution
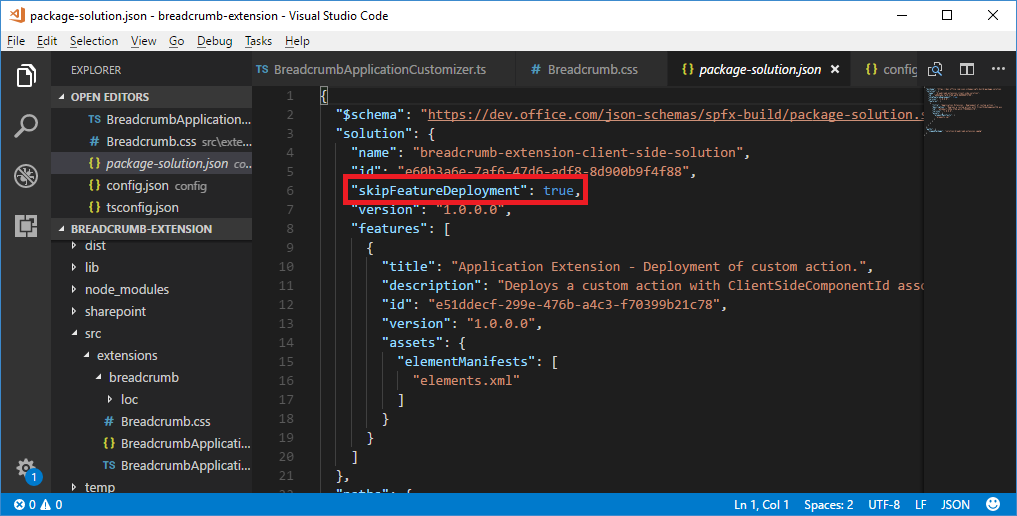
- On your project go to the config folder and open the package-solution.json and confirm if the property skipFeatureDeployment exists in the solution, if it doesn’t exist add it with the value true.
- Open the write-manifest.json and update the value of the cdnBasePath, the URL use the publiccdn.sharepointonline.com as prefix followed by the path to the library
https://publiccdn.sharepointonline.com/tenant host name/sites/site/library/folder - To get the basic structure for the packaging run the command
gulp bundle --ship - To get the installation package run the command
gulp package-solution --ship - On your project structure navigate to sharepoint/solution, in this folder you will find the *.sppkg file
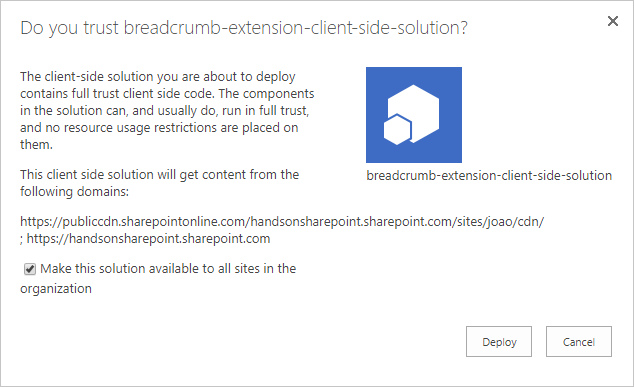
- Open your App Catalog and upload the sppkg file
- Check the box Make this solution available to all sites in the organization
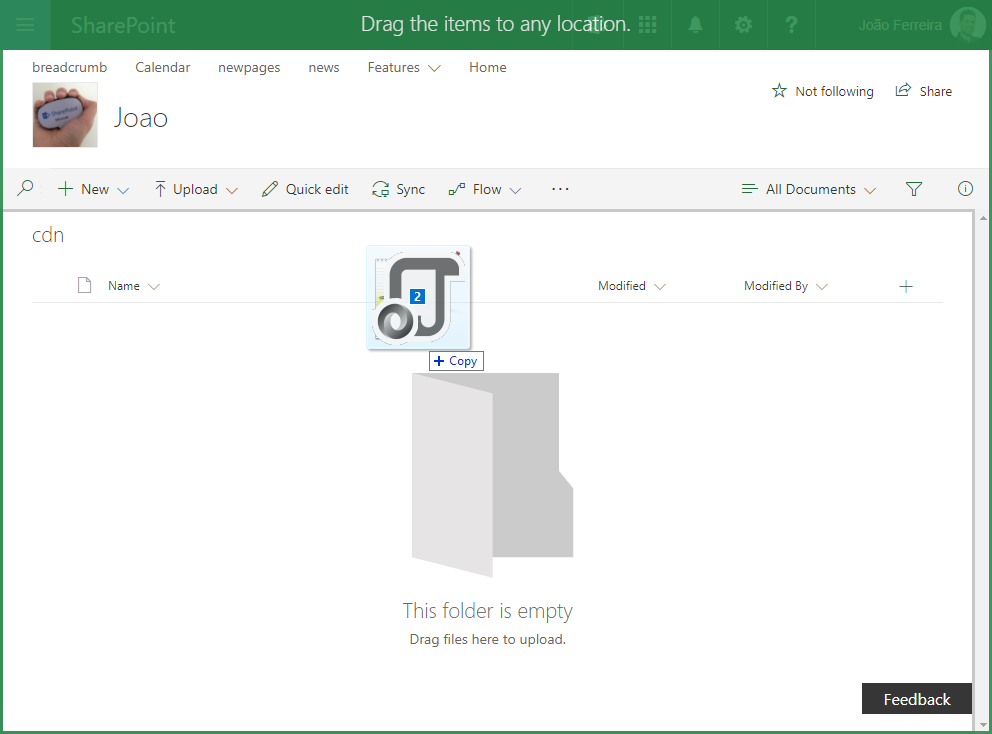
- Navigate to the temp/Deploy folder and drag the files to the CDN library
Make the solution available to all sites of the site collection
To make the extension visible to all the sites it needs to be deployed at the Site Collection scope. Unfortunately to the date I’m writing this article the scope property is not supported by the SPFx feature so I’ll use a workaround to make it available for the entire site collection.
There are a few alternatives to make the extension globally available to the site collection, in this article I’ll use the SPFx extensions CLI from Vardhaman Deshpande.
- On your command window run
npm install spfx-extensions-cli -g
- Autenticate on your SharePoint by running the command
spfx-ext --connect https://yourtenant.sharepoint.com/
- To make the custom action available to the site collection run the command
spfx-ext add "Breadcrumb" ApplicationCustomizer site
- To get the clientSideComponentId expand the dist directory, open the manifest.json and copy the id value
Conclusion
In this article you learned how to create a breadcrumb navigation to the modern SharePoint pages, ate the same time you learned a possible path to migrate code from the classic pages to the SharePoint framework.
This breadcrumb is not the only solution available and while writing this article I found out that there is already a React version available on the PNP GitHub.


November 22, 2017
Let me know when this works like this http://sharepoint.handsontek.net/2017/02/12/create-a-modern-breadcrumb-navigation-on-sharepoint/, so i can actually wrap my head around it! : O
November 22, 2017
Hi Jay,
By the end of the month I should be able to provide an installation package for this. As soon as the Asset Packaging feature is release by Microsoft I’ll update this article.
December 20, 2017
Sweetness!
December 18, 2017
João Ferreira,
Great resource! I was curious how you would hide this breadcrumb on the main homepage of the sharepoint site?
Thanks,
Brendon
December 19, 2017
Hi Brendon,
In this version it’s not possible.
I’ll add it as an option in future versions.
March 4, 2018
Hi Benny,
I have a second version of the breadcrumb planned that will include an option to define the depth of the breadcrumb.
I’m working on other projects now but the new version should be released soon.
June 4, 2019
Hi,
I tried to implement this for modern pages. I have few queries like
_renderPlaceHolders private method – where I need to refer this code. shall i refer inside the Extension class. Kindly help on this. while I run the gulp bundle – i got the error message.
June 10, 2019
Hi Lokesh,
Can you please let me know what is the error you are getting when you try to bundle the solution?
The _renderPlaceHolder method need to called inside the onInit() method like this: