

 HANDS ON SharePoint
 HANDS ON Teams
 HANDS ON Lists
 HANDS ON tek
 M365 Admin
How to Install SharePoint 2019 step by step on Hyper-V | Part 2 of 5
Installing SharePoint On-prem is not a straight forward task and there are a lot of requirements and dependencies involved in the process.
In this article you will find visual instructions to install it on a Hyper-V virtual machine; an installation like this should be used just for testing or development purposes.
This article has 5 different sections that will guide you through the installation process step by step, in order to accomplish it you will need to:
- Install and Configure Hyper-V
- Install Windows Server 2019
- Install Active Directory Domain Services
- Install SQL Server 2017
- Install SharePoint 2019
Install Windows Server 2019
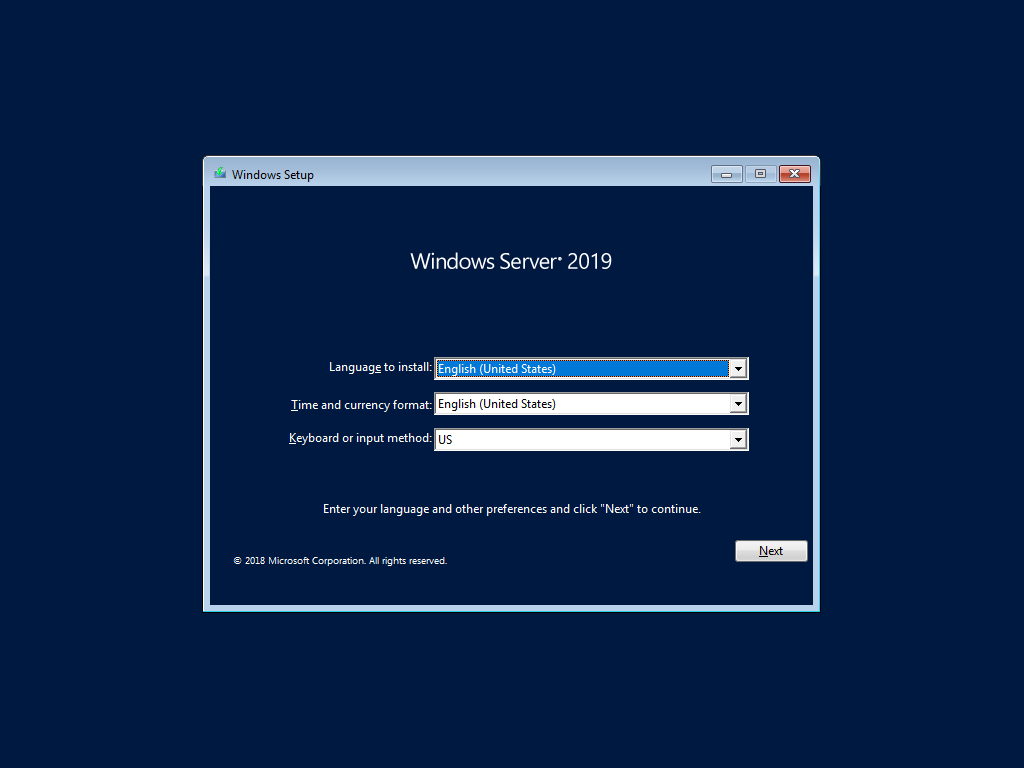
- Once the machine boots select the Language, Time and Currency format and the Keyboard input method
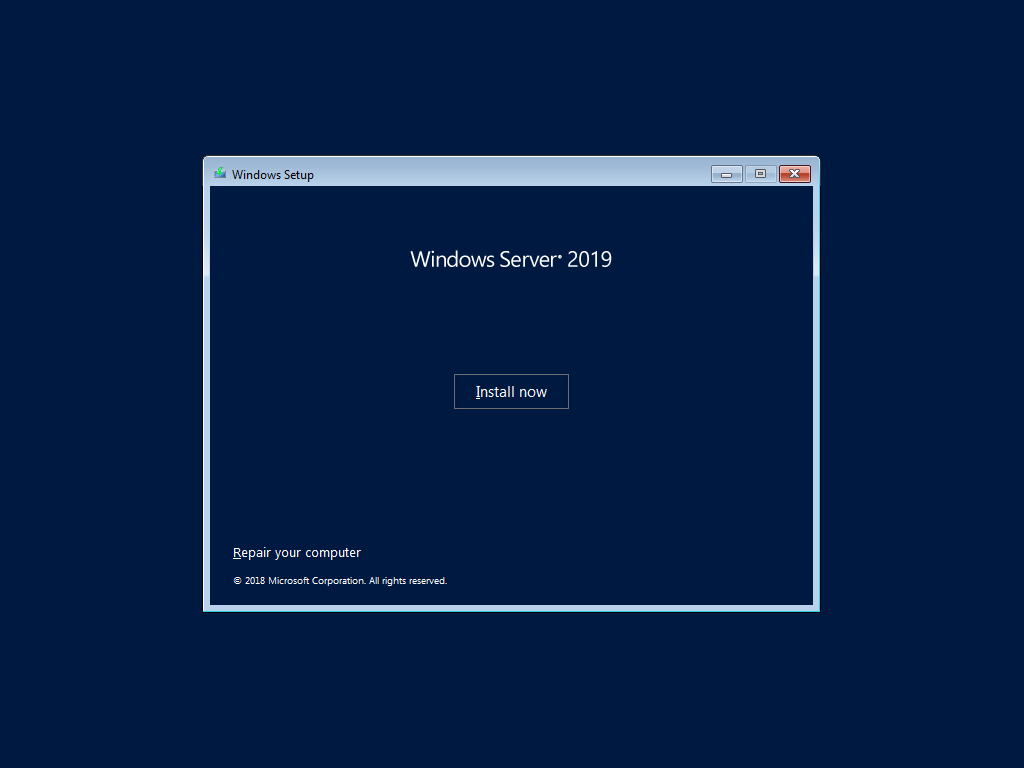
- Click on Install Now
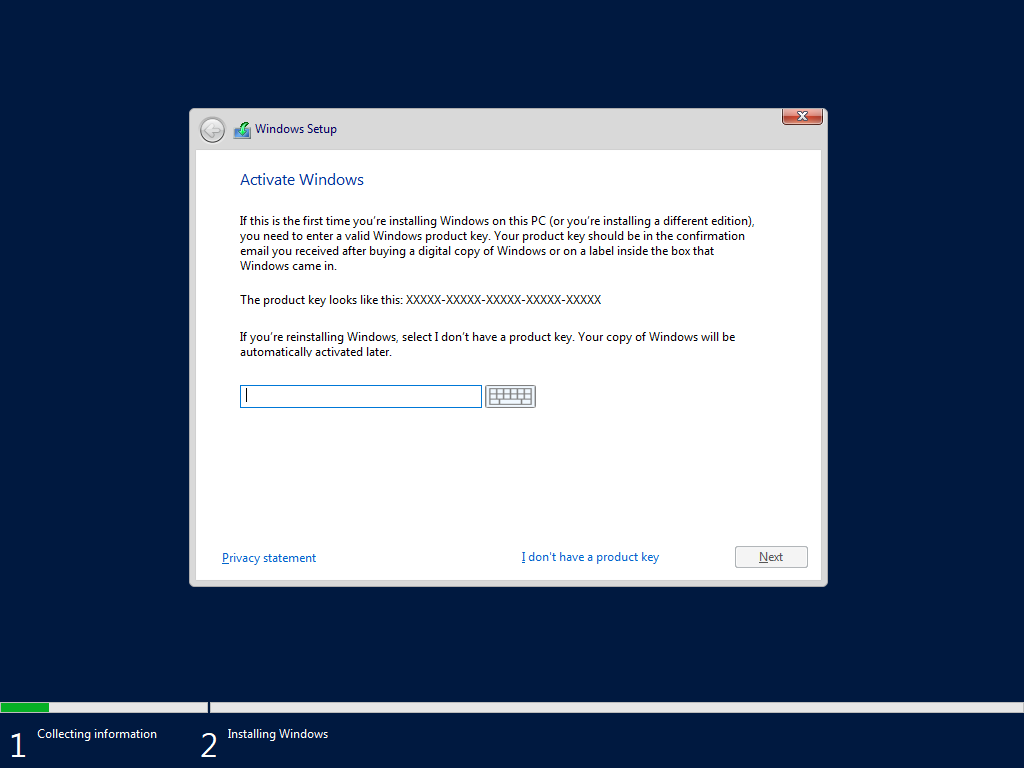
- Provide the key for your Windows Server
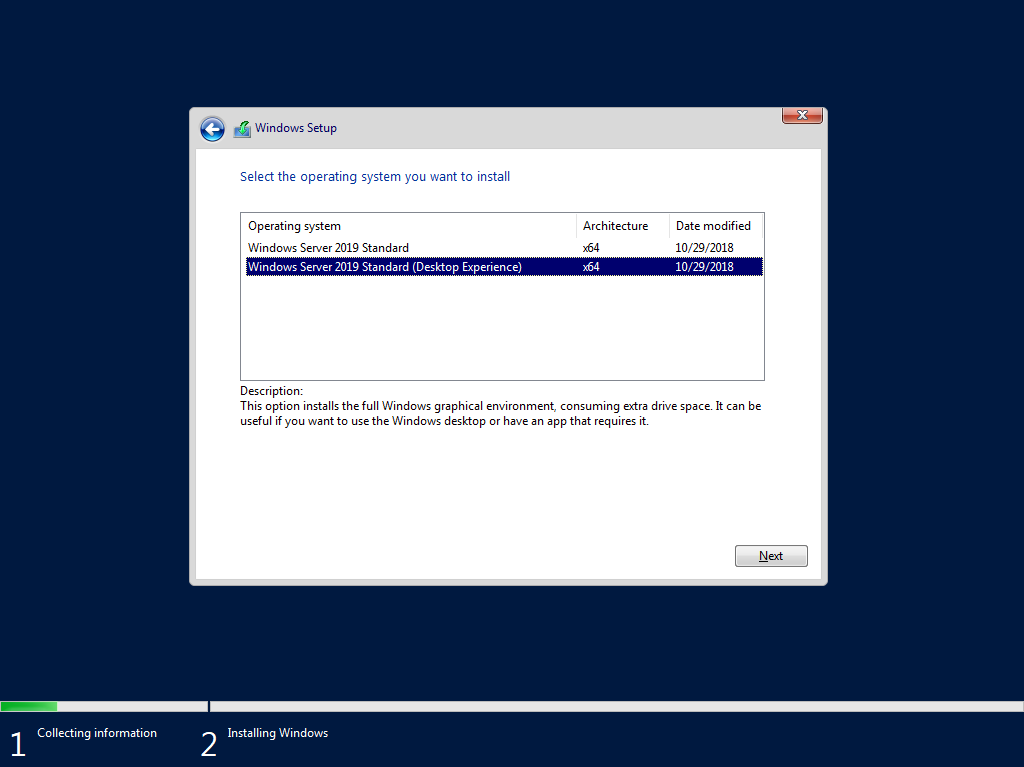
- Select the desktop version of your Windows
- Accept the terms and click next

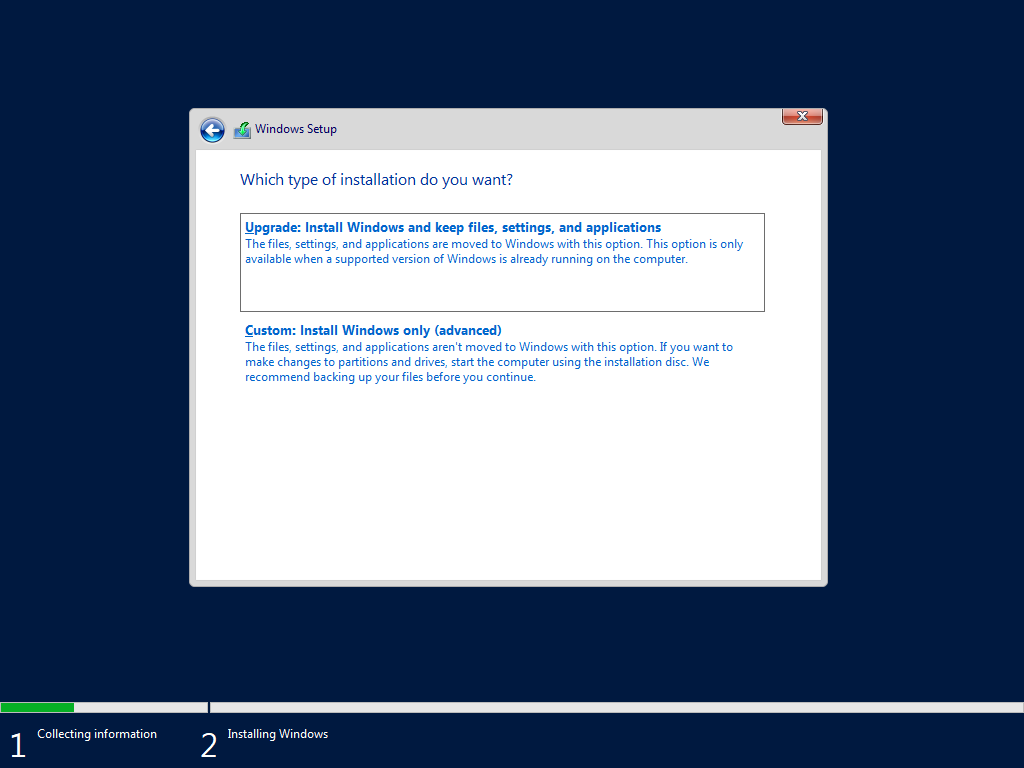
- Select Custom: Install Windows only (advanced)
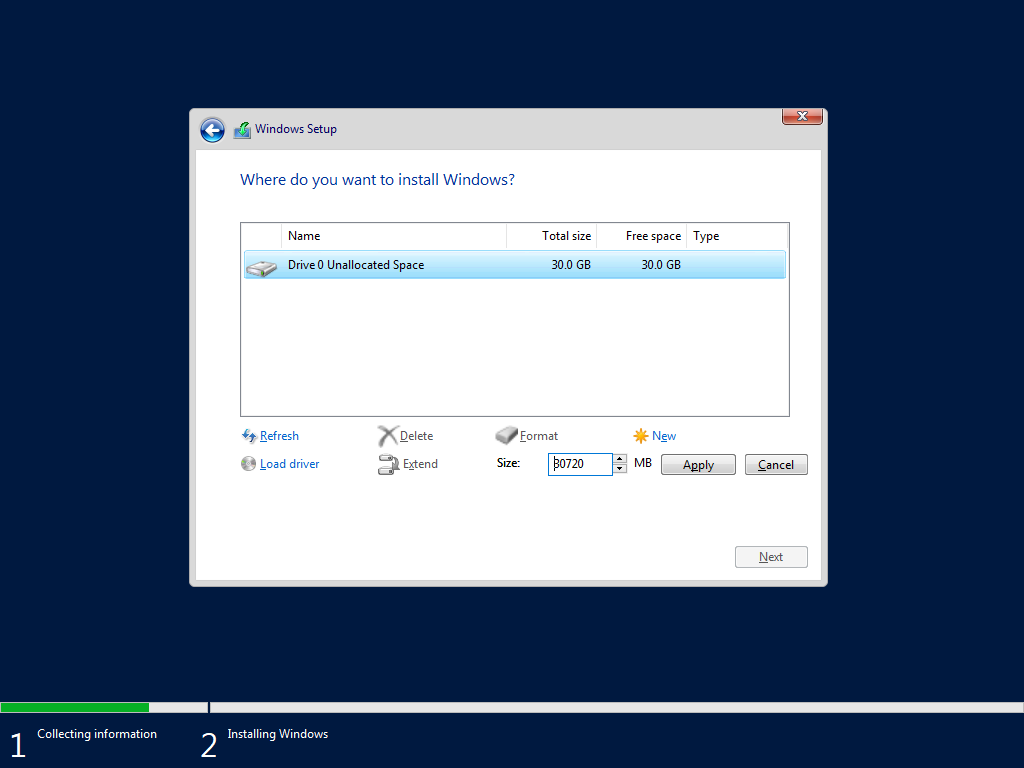
- Click on new and create a new partition, this process may take a few minutes and it will create 2 partitions
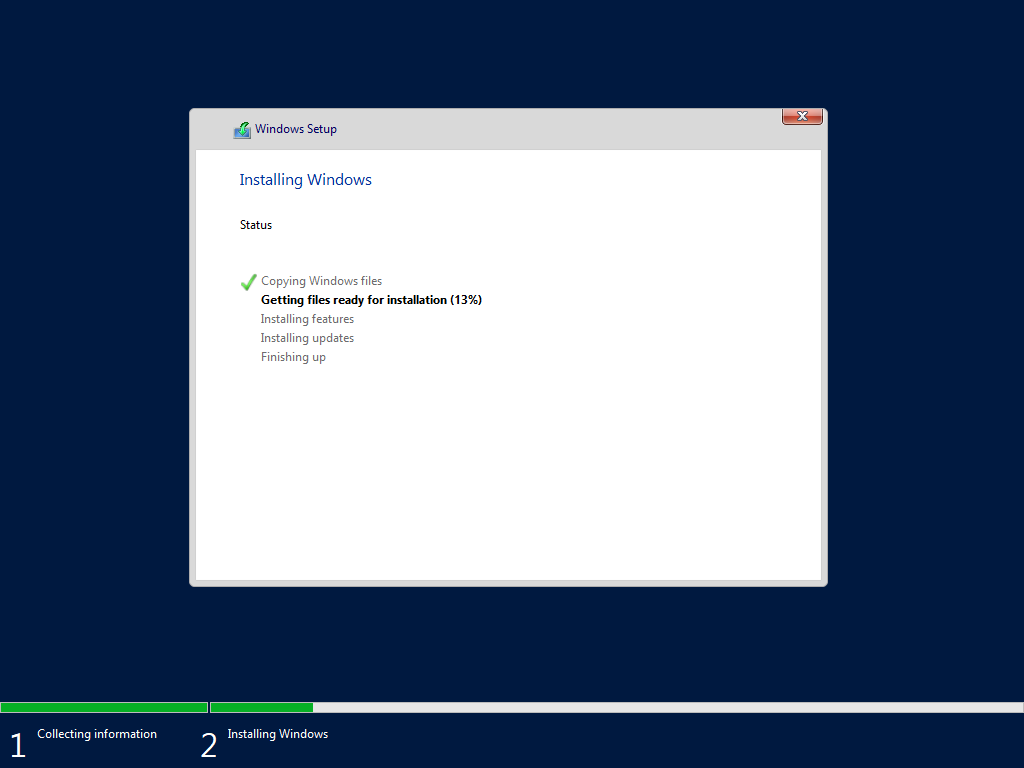
- Click next and wait for the end of the installation process
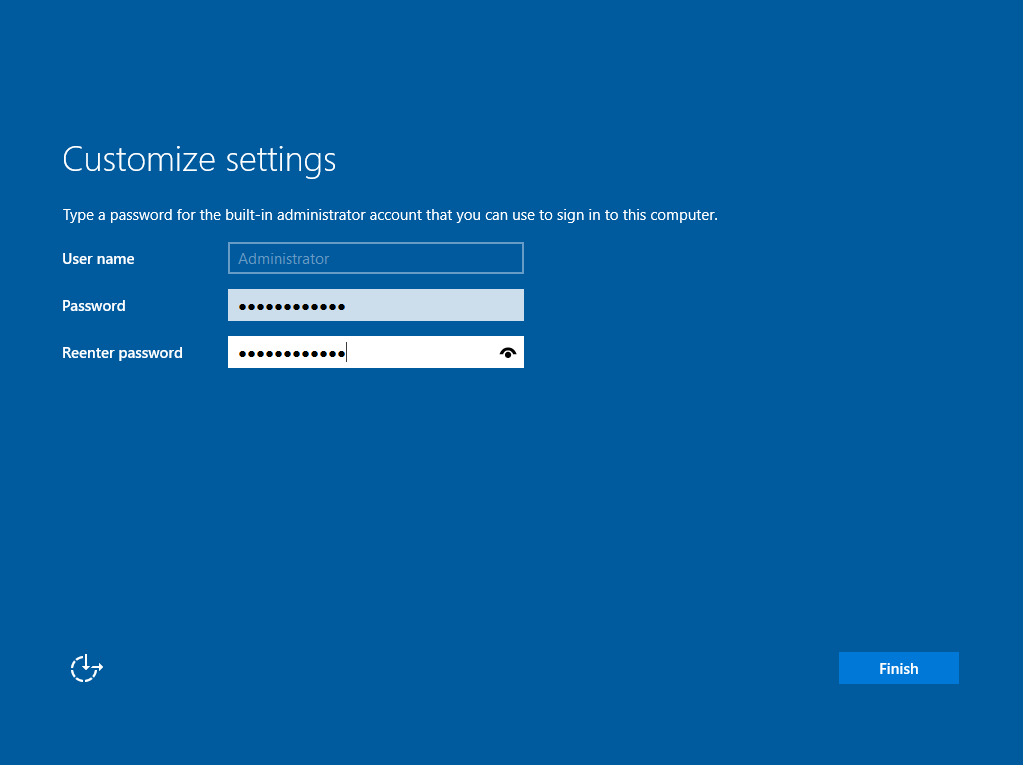
- Once the installation process ends, provide a password to the Administrator account and click Finish to end the installation and restart the virtual machine
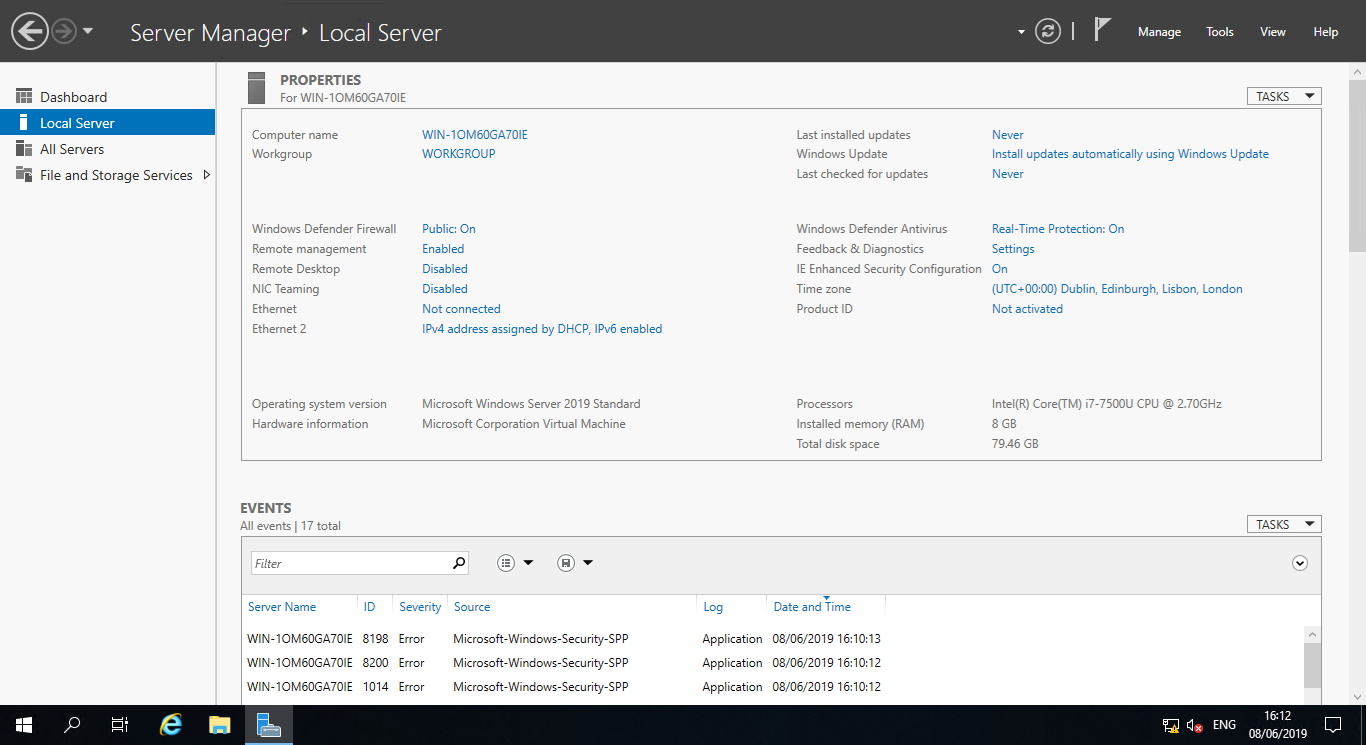
- The first thing to do once the Windows restarts is to change the computer name, to do it Click on Local Server in the server manager and then click on the computer name
- In the System Properties window click on Change

- Type the computer name of your choice e.g. SPS2019

- Click Ok, and then click on restart now
Proceed to the Active Directory Domain Services installation


May 13, 2020
Will this also work for Windows 2016 server?
May 13, 2020
Yes, the instructions are the same.