

 HANDS ON SharePoint
 HANDS ON Teams
 HANDS ON Lists
 HANDS ON tek
 M365 Admin
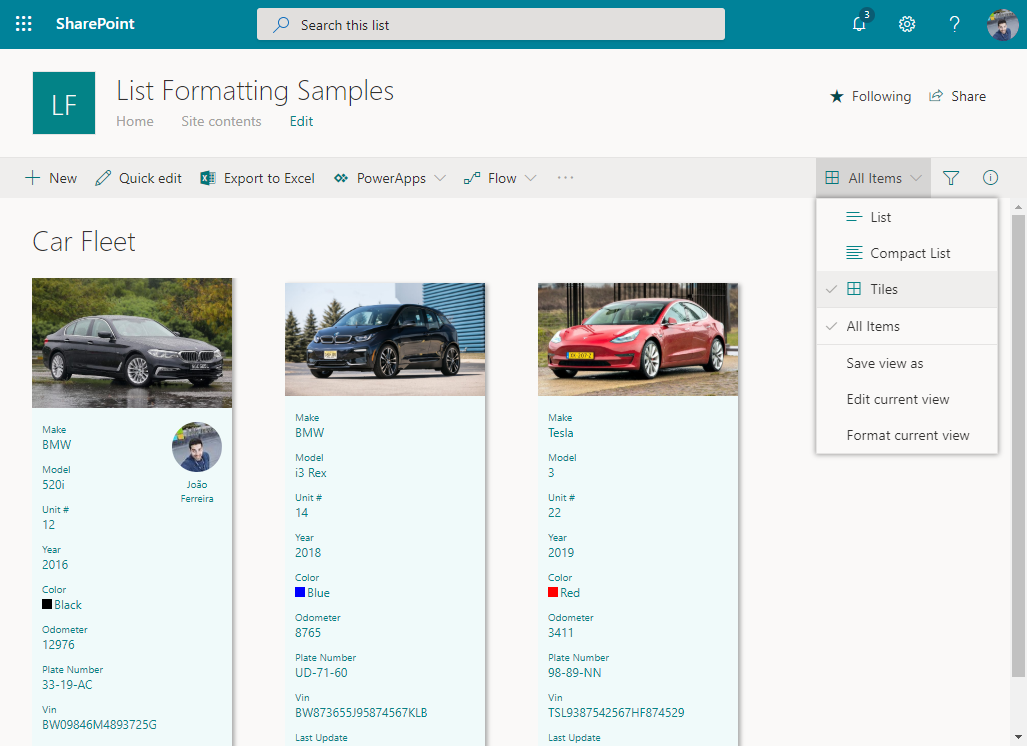
How to create a Tile view on modern SharePoint lists
Modern SharePoint lists just received the option to include a Tile view to display data on a modern and good-looking layout.
The Tile view is available on document libraries for a long time but the one released for lists is a bit different. While on libraries the layout is pre built by Microsoft on the lists you will have to build your own using the list view formatting feature.
If you are new to the list View Formatting, I strongly recommend you start by reading the official documentation here and here to get familiar with the JSON schema.

To add the Tile view to your list you will need to build your own JSON file, the easiest way to do this is start by using one of the available templates and modify it according to your needs.
To simply add the Tiles View option to one of your lists do the following:
- Navigate to your list
- On the right side of the command bar click on All Items and then Format this View
- Paste the sample below and click Save
{ "schema": "https://developer.microsoft.com/json-schemas/sp/view-formatting.schema.json", "hideColumnHeader": "true", "hideSelection": true, "tileProps": { "hideSelection": true, "width": "180", "height": "150", "formatter": { "elmType": "div", "children": [ { "elmType": "div", "attributes": { "class": "ms-bgColor-themeLighterAlt ms-bgColor-themePrimary--hover ms-fontColor-white--hover" }, "style": { "display": "flex", "flex-wrap": "wrap", "min-width": "180px", "min-height": "150px", "margin-right": "10px", "margin-top": "10px", "box-shadow": "2px 2px 4px darkgrey" }, "children": [ { "elmType": "div", "style": { "text-align": "center", "margin": "auto" }, "children": [ { "elmType": "div", "attributes": { "class": "sp-row-title " }, "txtContent": "[$Title]" } ] } ] } ] } } } - This example makes the Tiles option available and show the Title of your list as a tile
If you have used the list view formatting before you should be familiar with the property rowFormatter that is used to format the List and Compact list views. To create the Tiles view your JSON definition is added inside the property tileProps.
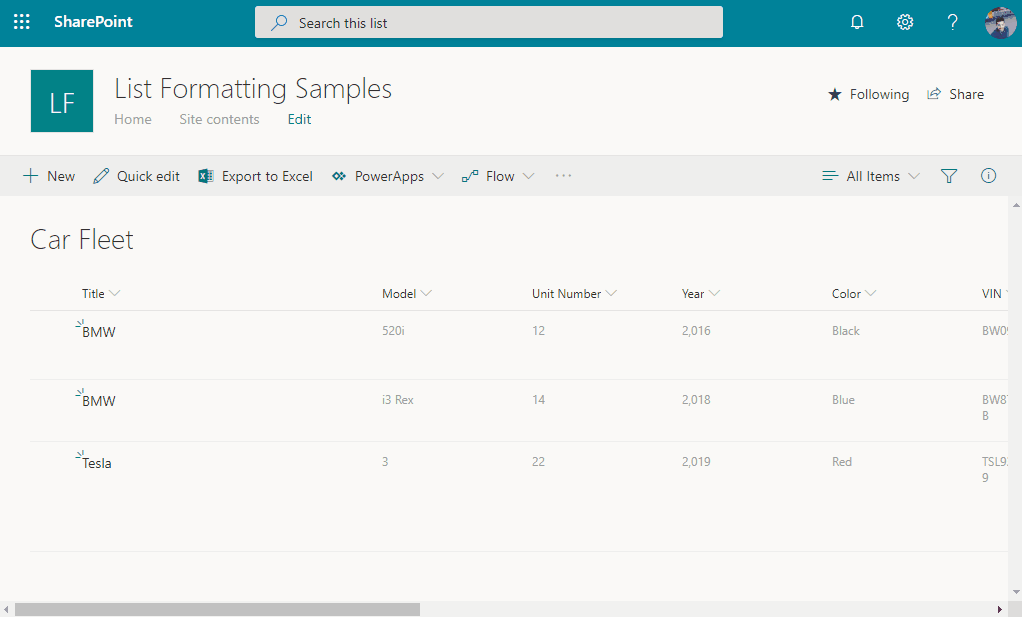
Manage your car fleet sample
To test this new feature, I’ve built a demo list to manage a company car fleet to show each car and the person to which the car is assigned to.
To apply it on your own environment, do the following:
- Download and extract the template from here
- Edit the variables at the top of the file
- $siteURL – is the url to the communication site where the template will be applied
- $user – must be an email from a user that exists in the communication site, this is used by the views that format the Person
- Save the file
- Right click on it and choose Run with PowerShell
- Introduce your credentials and click OK
- Once the template is executed you can open the Car Fleet list and select the Tiles view to see how the list data can be transformed into something modern and appealing.
column
If you have suggestions for other templates fell free to reach out by email or in the comment section.


September 11, 2019
This is awesome!
September 11, 2019
Thanks Sam, appreciate your feedback
September 12, 2019
It’s very nice.
I do notice two things.
When I remove the JSON, it wipes out my view so I don’t see any items.
When I click on “BMW” in your example, nothing happens. Shouldn’t it edit the item?
September 12, 2019
Hi Steve,
Thanks for your feedback.
If you remove the JSON SharePoint will automatically remove the Tiles view and you will end with a blank page until you select the list view or refresh your page.
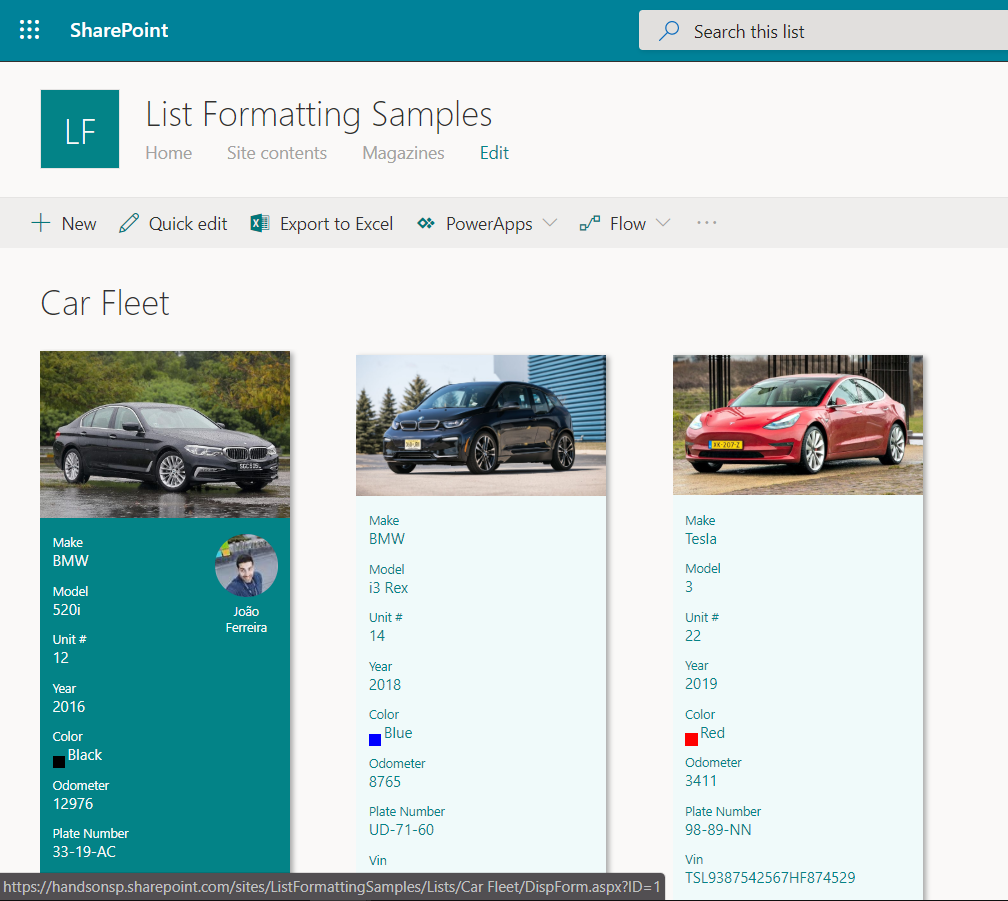
When you click on the car item it should open the detailed view of the item but not in edit mode, if you copy the link of the tile it should look like this.
https://handsonsp.sharepoint.com/sites/ListFormattingSamples/Lists/Car%20Fleet/DispForm.aspx?ID=1
Does the link has a different format on your site?
September 12, 2019
Nothing actually pops up.
Down at the bottom left of the screen I get a “javascript;:” message with nothing after it. Both in Chrome and FireFox.
September 12, 2019
Steve, do you know if there is any other solution installed on the site intercepting the links?
Are viewing the formatting directly on the list or inside the list web part?
Below is an image of how it looks on my both tenants.
September 12, 2019
Definitely in the list itself and not looking at the web part from the front page.
September 12, 2019
Not sure what might be causing the issue but I’ll try to reproduce it on a new tenant. Tanks for the feedback once again Steve.
Have a nice day.
September 17, 2019
[…] How to create a Tile view on modern SharePoint lists – Joao Ferreira (BindTuning) […]
September 25, 2019
[…] How to create a Tile view on modern SharePoint lists […]
April 10, 2020
I have successfully installed the template.
May 26, 2020
Hi Ana,
Yes it’s possible to do it, you can find the instructions here.
Have a nice day 🙂
November 5, 2020
Is there a way we can make this selectable, so that we can use dynamic filtering when we use it as a web part on a page ?
November 17, 2020
Hi Sarthak,
Yes there is a way of doing it, all you have to do is change the
to
in the JSON.
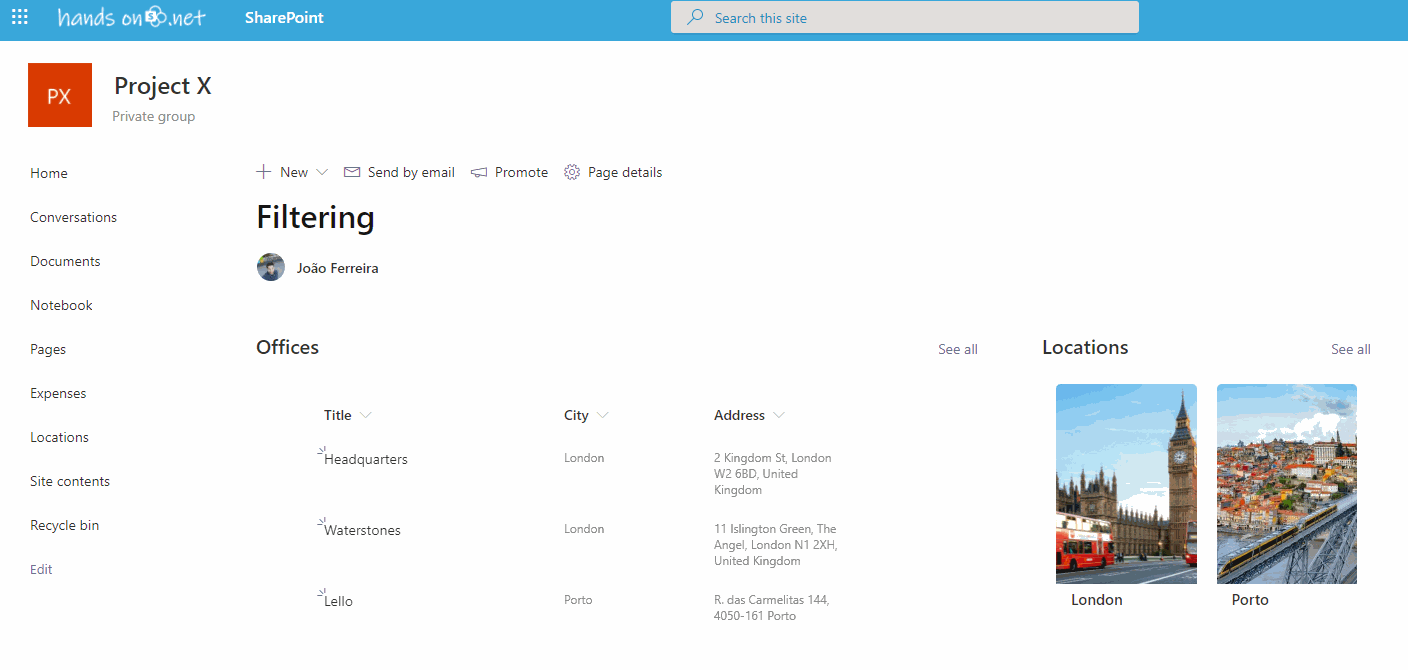
Then using the Lists web part you need to configure the filtering and connect the columns in both lists, the end result will be something like this animation.
January 30, 2021
I would love to do the dynamic filtering shown here. Can you share the how you did the filtering? I am having a hard time figuring that part out. I got my list loaded and the list properties loaded but can’t get the filtering right to show like yours.
Thanks so much, your site is awesome!
February 3, 2021
Hi Laura,
Have a look to this article -> https://sharepoint.handsontek.net/2021/02/02/filter-sharepoint-lists-dynamically/
Hope it helps with the configuration of the webparts.
Have a nice day 🙂