Building a SharePoint intranet with ChatGPT and Bing – Announcements and Alerts
Announcements and alerts are all important features in a SharePoint intranet and are used to disseminate information to employees or members of an organization.
All these features are important for keeping employees informed and engaged with the organization and can help to improve communication and collaboration within the workplace.

In this article I’m explaining how you can use SharePoint lists and view formatting to inform your users about important things happening in the organization.
The 2 different types can be used to inform users about different types of events:
- Announcements – typically used to share news, updates, or other information of interest to employees. They can be displayed prominently on the intranet homepage or within specific sections of the site
- Alerts – usually used to notify employees of urgent or time-sensitive information. For example, if there is a security threat or a network outage, an alert may be sent to all employees via the intranet to inform them of the situation and provide instructions on what to do next
How to create a SharePoint list for announcements and alerts
The announcements and alerts will be stored in a list in your intranet site collection, to create it do the following:
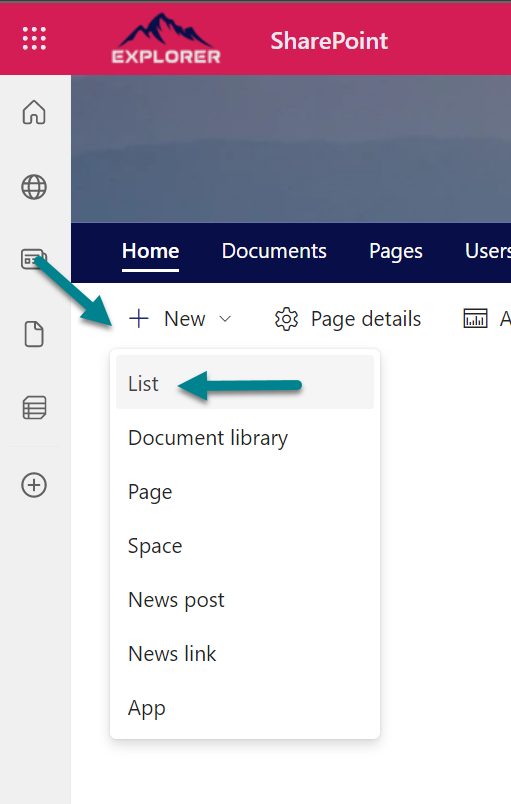
- On the intranet landing page click New and then List
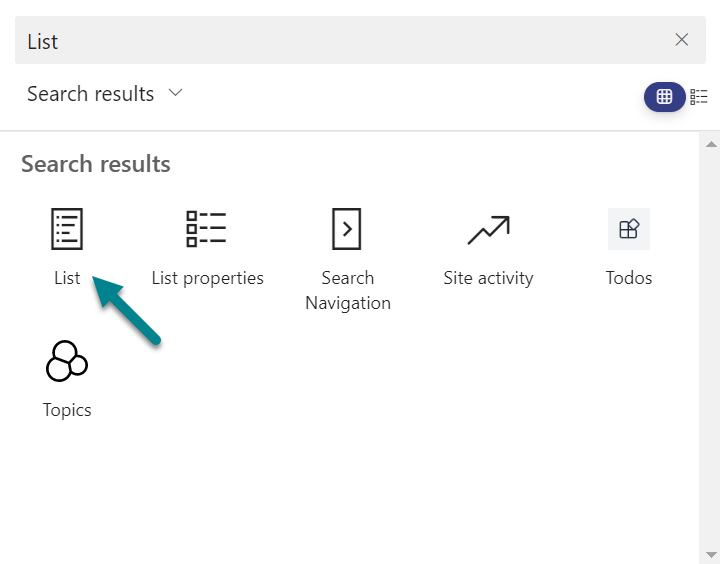
- Select Blank list to create a new structure from scratch
- Provide a name and a description for you list, optionally uncheck the option to remove it from the navigation
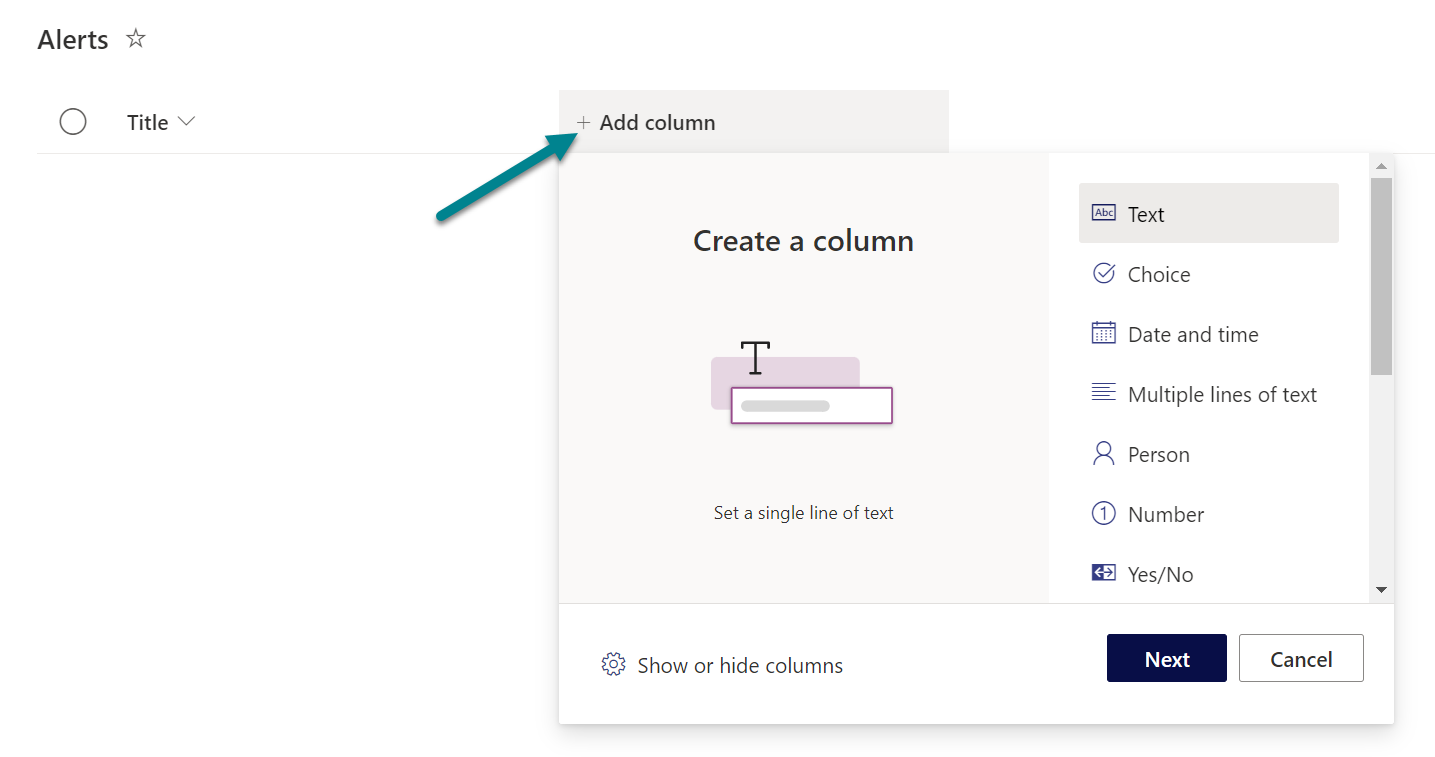
- Once the list gets created click in the Add column option; add the columns as detailed in the following table, make sure you create them with the same name and the same column type, a different name or a different type may have an impact in the view formatting provided in this article
| Name | Column type |
|---|---|
| Description | Multiple lines of text, with the option to use enhanced rich text off |
| TypeAnn |
Choice with the following options:
|
| RemoveDate |
Date and time, make sure to check the option to include the time The message will be removed automatically once the date defined in this column is reached |
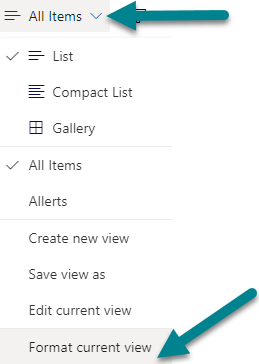
- With the list structure created click in the view selector and then Format current view
- In the source editor paste the following code, this view formatting was inspired in a sample built by David Ramalho and was modified to work in any area of the intranet landing page
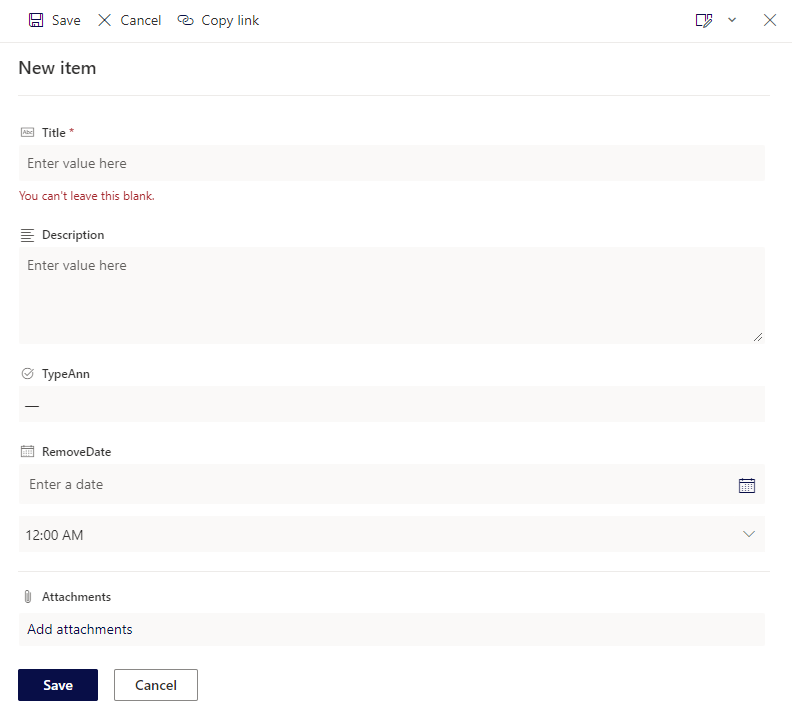
{ "$schema": "https://developer.microsoft.com/json-schemas/sp/v2/row-formatting.schema.json", "hideColumnHeader": true, "hideSelection": true, "rowFormatter": { "elmType": "div", "style": { "width": "100%", "padding-bottom": "5px", "display": "=if([$RemoveDate] <= @now, 'none', '')" }, "children": [ { "elmType": "div", "style": { "border-radius": "4px", "font-size": "1rem", "background-color": "=if([$TypeAnn] == 'Danger', '#fdeded', if([$TypeAnn] == 'Success', '#edf7ed', if([$TypeAnn] == 'Warning', '#fff4e5', '#e5f6fd')))", "line-height": "1.43", "padding": "6px 16px", "align-items": "center", "flex-flow": "wrap", "width": "100%" }, "children": [ { "elmType": "span", "attributes": { "iconName": "=if([$TypeAnn] == 'Danger', 'ErrorBadge', if([$TypeAnn] == 'Success', 'Completed', if([$TypeAnn] == 'Warning', 'warning', 'info')))" }, "style": { "font-size": "10px", "padding-right": "5px", "font-weight": "700", "color": "=if([$TypeAnn] == 'Danger', '#ef5350', if([$TypeAnn] == 'Success', '#4caf50', if([$TypeAnn] == 'Warning', '#ff9800', '#03a9f4')))" } }, { "txtContent": "[$Title]", "elmType": "span", "style": { "font-weight": "700", "font-size": "14px" } }, { "elmType": "p", "txtContent": "[$Description]", "style": { "font-size": "14px", "margin": "5px 0 5px 0" } } ] } ] } } - To create a new message, click New and fill the form
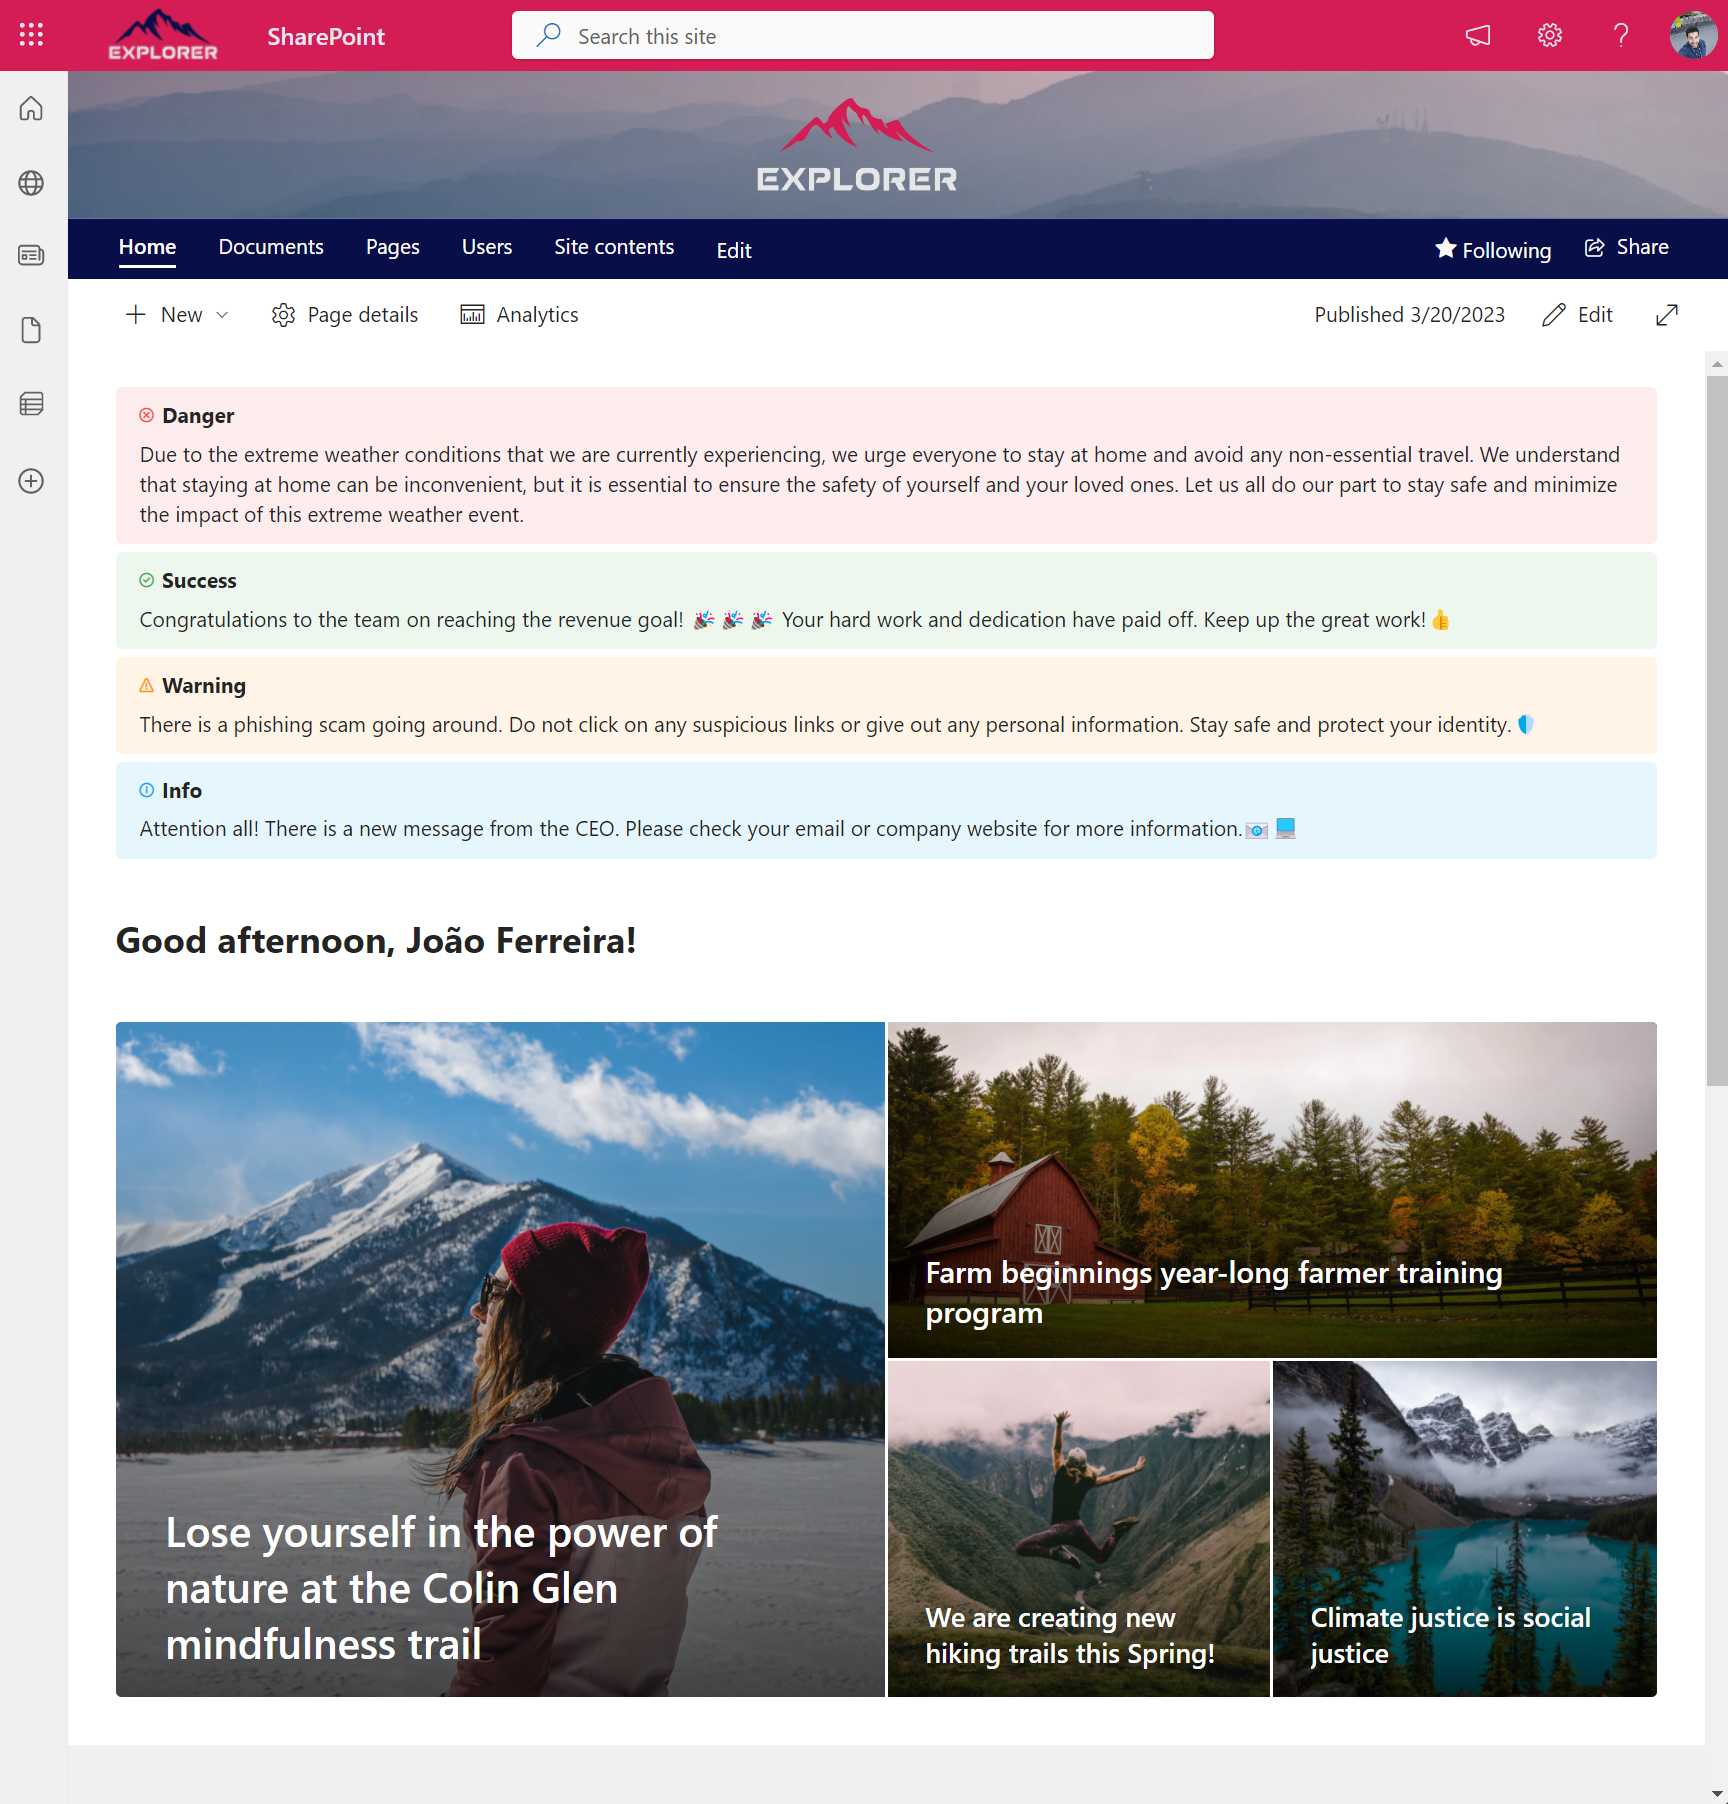
You noticed that there are 4 different types that you can choose for your message, each one has its own icon and background color mapped to the type as shown in the following image:

How to add the announcements and alerts to the intranet landing page
To add the formatted SharePoint list to the intranet landing page you will need to use the Lists web part, to add it to the following:
- Edit the intranet landing page
- At the top of the page click in the + icon and search for the list web part
- Click on it to add it to the page

- Select the list you just created and formatted
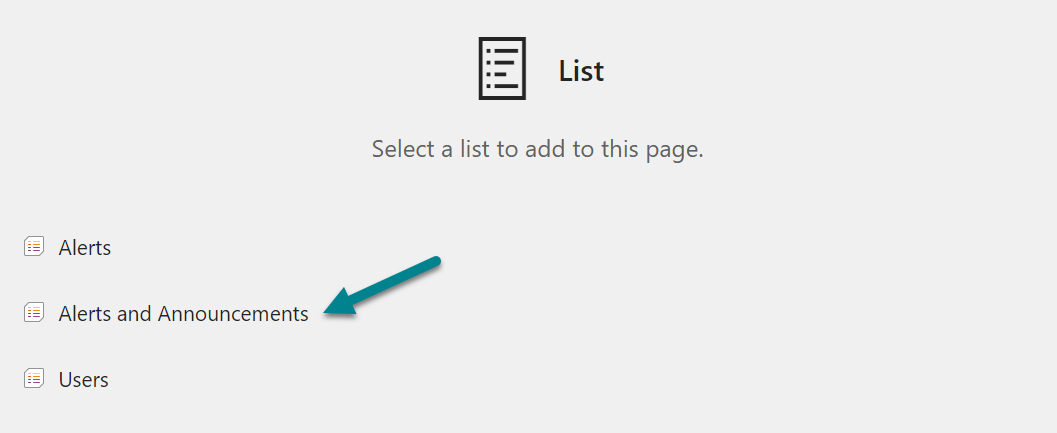
- Click in the pencil icon to open the web part settings
- Select the view with the formatting applied
- Hide the command bar and the see all button

As I want to add the messages to the top of the intranet landing page and don’t want it to occupy space when there are nothing to show, I've customized it a little with a javascript that goes inside of the script editor.
The following code hides the webpart title, the paddings and margins around it, if you don’t have the script editor in your landing page have a look here.
<script>
    document.querySelector('[data-automation-id="ListWebPart"] [data-automation-id="webPartHeader"]').setAttribute('style','display:none; padding:0;');
    document.querySelector('[data-automation-id="CanvasControl"]').setAttribute('style','padding: 0; margin-bottom: 0!important;');
    document.querySelector('[data-automation-id="CanvasControl"] [data-automation-id="detailsListContainer"]').setAttribute('style','padding: 0px 8px;');
</script>
Conclusion
By using this list effectively, organizations can ensure that employees are aware of important information in a timely manner and can stay connected and engaged with the organization's goals and objectives, directly from the landing page of the intranet.

 HANDS ON tek
 M365 Admin








May 4, 2023
Great post however when entering the code into advanced mode on ‘format view’ the entire list disappears from view. Any ideas why this may be?
May 4, 2023
Managed to resolve – requires a remove date to be in place. Great post thank you!
February 8, 2024
Hello,
The formatting has a condition that prevents items from being displayed after the expiration date.
If you remove this line from the code it will display everything.
Have a nice day :)