

 HANDS ON SharePoint
 HANDS ON Teams
 HANDS ON Lists
 HANDS ON tek
 M365 Admin
How to upload files from Public URLs to SharePoint using PowerAutomate
Sometimes you have the need to store information that is publicly available on the internet on your SharePoint site. This might be a tedious task which involves downloading and uploading the files one by one to the desired document library. But it doesn’t need to be like that. With Power Automate, you can make your life a lot easier.
In this article, I’ll explain you how to upload a file to SharePoint from the internet using Power Automate. To do that, I’ll use the Image of the Day from Bing. Each day, Microsoft publishes a new image in Bing and I want to save a copy of it in a document library. The process described here is specific for the Bing scenario, but it can be easily adapted to other scenarios.

The Bing image of the day is available as a feed and with Power Automate, you will be able to make an HTTP request to that feed, capture the response, and then make another HTTP request to get the content of the file. To implement this solution, do the following:
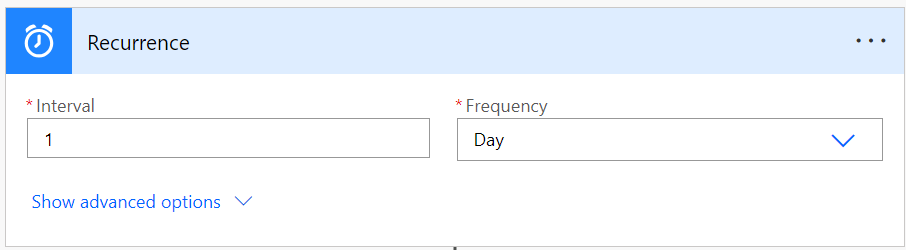
- Start by creating a schedule cloud flow that will be executed once a day
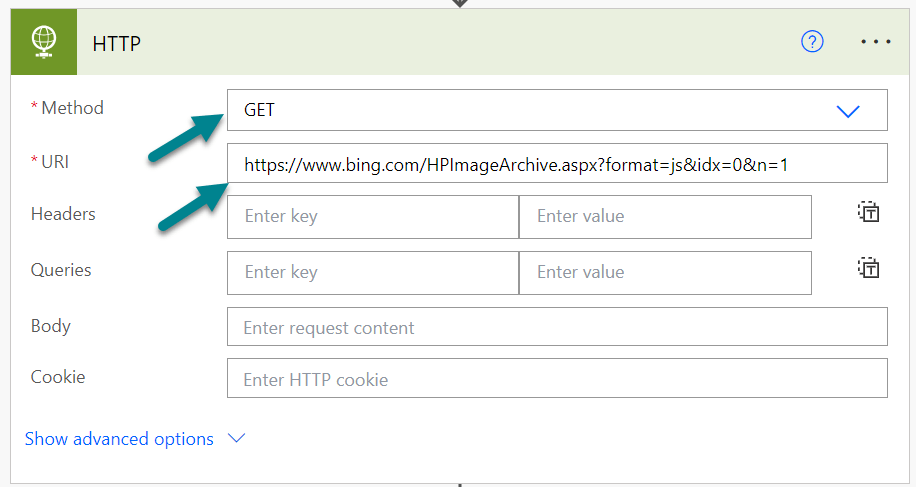
- Add an HTTP request action, in the Method field, select GET. In the URI field, enter the following URL: https://www.bing.com/HPImageArchive.aspx?format=js&idx=0&n=1&mkt=en-US. This is the URL of the Bing image of the day feed, which returns a JSON object with information about the image. You can change the mkt parameter to your preferred language and region.
- Click on New stepand search for Parse JSON and select the Data Operation – Parse JSON action
- Select the Data Operation – Parse JSONaction
- In the Schema field, click on Generate from sample and paste the following JSON sample
{
    "images": [
        {
            "startdate": "20240219",
            "fullstartdate": "202402190800",
            "enddate": "20240220",
            "url": "/th?id=OHR.LincolnSunset_EN-US8001542624_1920x1080.jpg&rf=LaDigue_1920x1080.jpg&pid=hp",
            "urlbase": "/th?id=OHR.LincolnSunset_EN-US8001542624",
            "copyright": "Lincoln Memorial, Washington, DC (© Steve Whiston/Fallen Log Photography/Getty Images)",
            "copyrightlink": "https://www.bing.com/search?q=Presidents+Day&form=hpcapt&filters=HpDate%3a%2220240219_0800%22",
            "title": "A tribute at twilight",
            "quiz": "/search?q=Bing+homepage+quiz&filters=WQOskey:%22HPQuiz_20240219_LincolnSunset%22&FORM=HPQUIZ",
            "wp": true,
            "hsh": "2aed74202801fc18827c25a80e43b490",
            "drk": 1,
            "top": 1,
            "bot": 1,
            "hs": []
        }
    ],
    "tooltips": {
        "loading": "Loading...",
        "previous": "Previous image",
        "next": "Next image",
        "walle": "This image is not available to download as wallpaper.",
        "walls": "Download this image. Use of this image is restricted to wallpaper only."
    }
}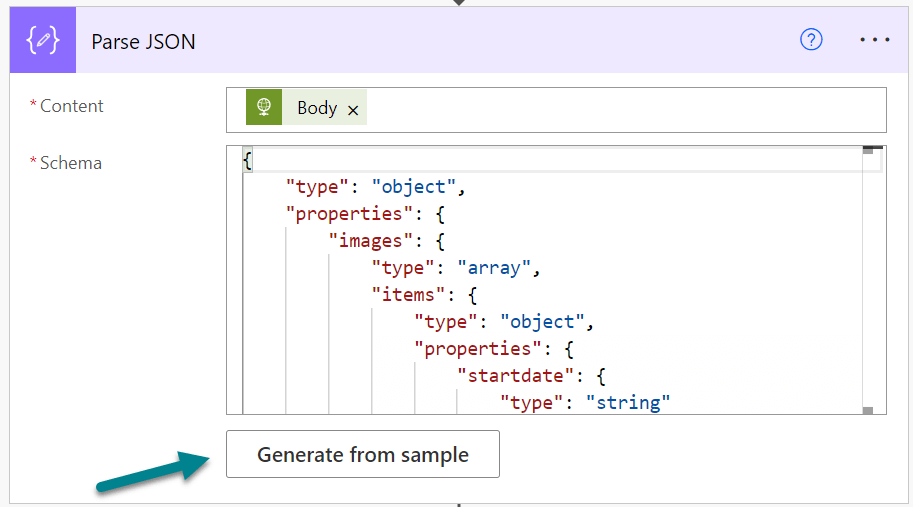
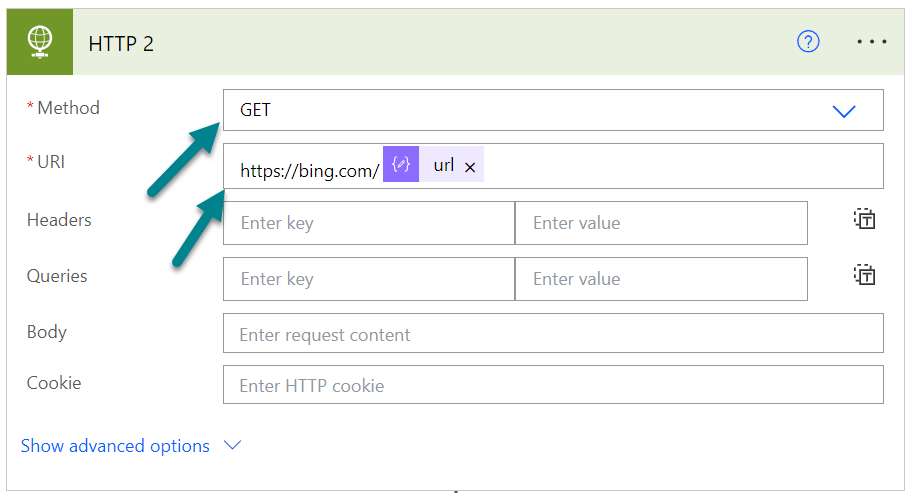
- Add an HTTP request action, in the Method field, select GET. In the URI field, enter https://bing.com/ followed by the URL from the parse JSON
- Click on New step and search for Create file, select the SharePoint – Create file action
- Add the site address where the images will be stored and select the document library
- Provide a file name, I suggest to use the startdate for the image to prevent getting errors trying to store two images with the same name
- In the file content paste the Body value from the secont HTTP request
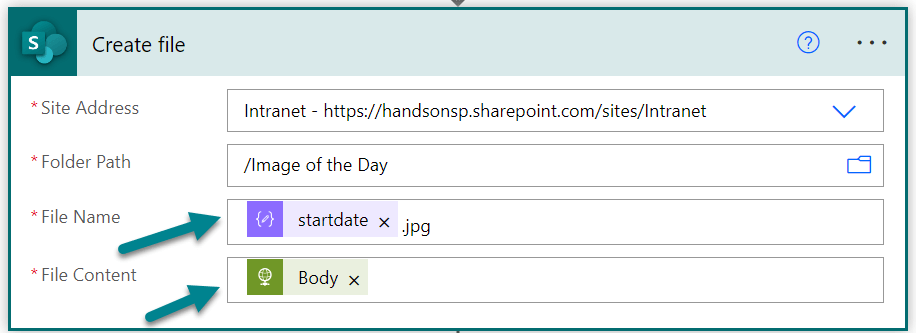
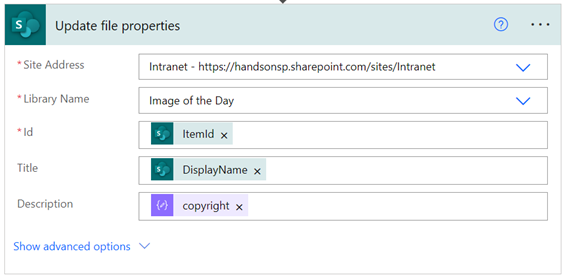
- Optionally update the file properties in case you want to add more information to the image, in my case I’m also storing the Description for each of the images
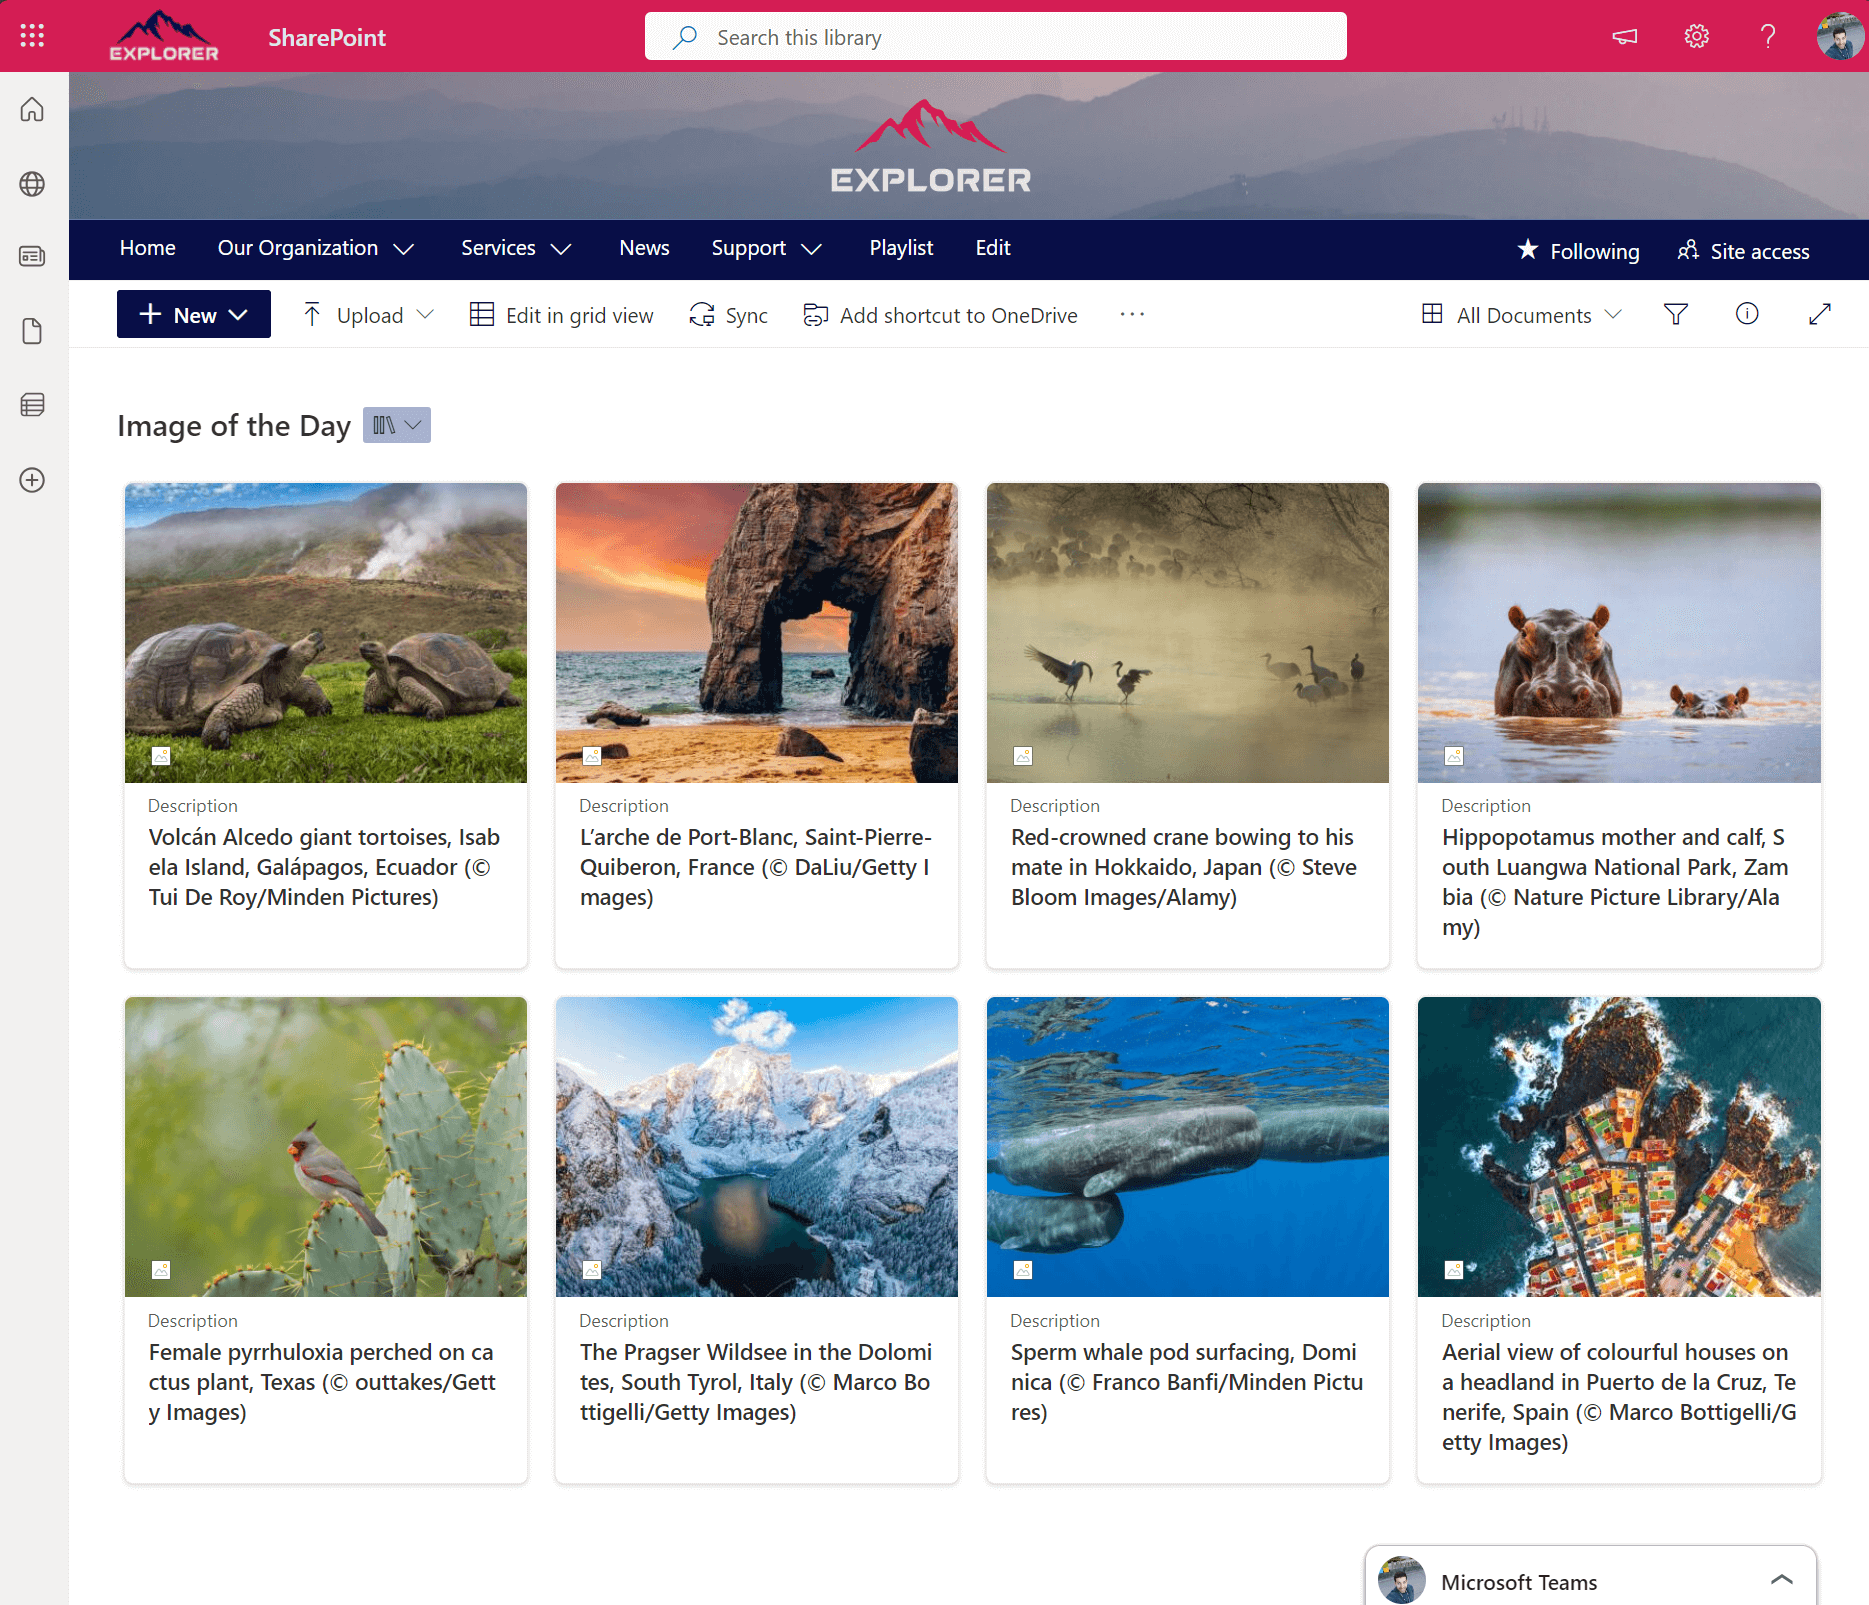
Now, you can test your flow and see if it works as expected. Go to your SharePoint site and open your document library. You should see a new image every day.


No comments yet